Updated
There's a newer version of this post - see here
This post provides an overview of how to use the scene-referred workflow in darktable using easy, step-by-step instructions. See this article and the manual for an explanation of what scene-referred means and why you should use it over the display-referred workflow that many photo processing programs still use.
In addition, the excellent tutorial videos by Boris Hajdukovic and Bruce Williams as well as the filmic faq also provide a good overview of these tools and the overall workflow.
Setup
Workflow
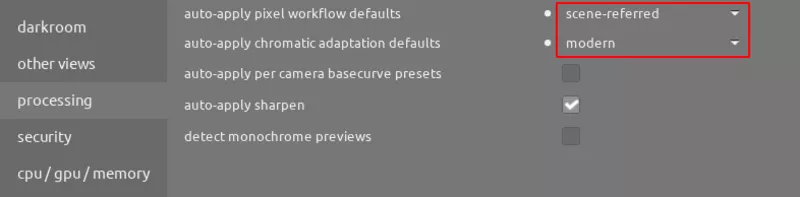
Before processing images, set the following settings in the processing tab of the Preferences window to enable a scene-referred workflow:
You can also choose scene-referred (sigmoid) if you prefer the sigmoid module over filmic rgb; both work well and you may prefer one or the other in different situations. This setting only sets the default, so you can always switch to the other module on a particular image.
Theme
In the general tab, set the theme to darktable-elegant-grey. This is important to help judge a correct exposure since the grey background of this theme is roughly 18% grey (middle gray).
Modules
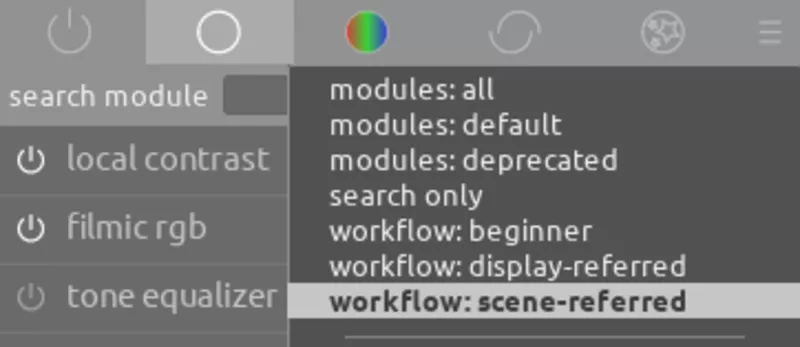
Moreover, set the list of modules you are using to the scene-referred workflow (or your own similar grouping of these modules):
If you hover over the name of a module, it will tell you if it is operating in a scene-referred or display-referred mode. If you use a blend mode on the module, make sure to select the either scene-referred or display-referred from the list of blend modes as needed:
Lens Correction
Create a preset to automatically enable the lens correction module for your lens to adjust for lens distortion.
Capture
When capturing your image, use ETTR to collect as much light as possible and make the signal-to-noise ratio as high as possible so there is more information to work with (see more information on ETTR).
RAW Overexposure Check
Note
RAW overexposure will not change based on the adjustments you make to the exposure in the sections below; these are pixels that were clipped at time of capture and can only be reconstructed as outlined here
After entering the darkroom mode, hit Shift+O to check RAW overexposure. If there are clipped highlights in the RAW that you want to recover, decide if you want to use the highlight reconstruction module or not (details in the manual). If you do enable it, the default inpaint opposed setting for method will likely give the best results.
When done reviewing the RAW overexposure and setting highlight reconstruction, hit Shift+O to stop showing the RAW overexposure. Proceed with setting a correct exposure for the midtones and then the shadows and highlights. Once those steps are complete, you can attempt to recover these RAW overexposed highlights if desired.
Midtones Exposure
Tip
If you have trouble matching the midtones to the grey background, consider enabling the B&W : luminance-based preset in the color calibration module temporarily while making this adjustment (and reset the module once done).
Hit Ctrl+B to show the color assessment window. On the exposure module, use the exposure slider to increase the midtones until they look good relative to the grey background (which is roughly middle gray). At this point, if you have any bright whites in your photo, they should look similar to the white border.
Do not worry about the highlights or shadows seeming to be clipped (we will pull those back shortly). You'll likely not need to adjust other sliders on the exposure module.
Shadows and Highlights Exposure
Tip
See the graphic display section of the manual for filmic rgb - you may find it easier to visualize what the settings in this module are doing by setting it to the dynamic range mapping view.
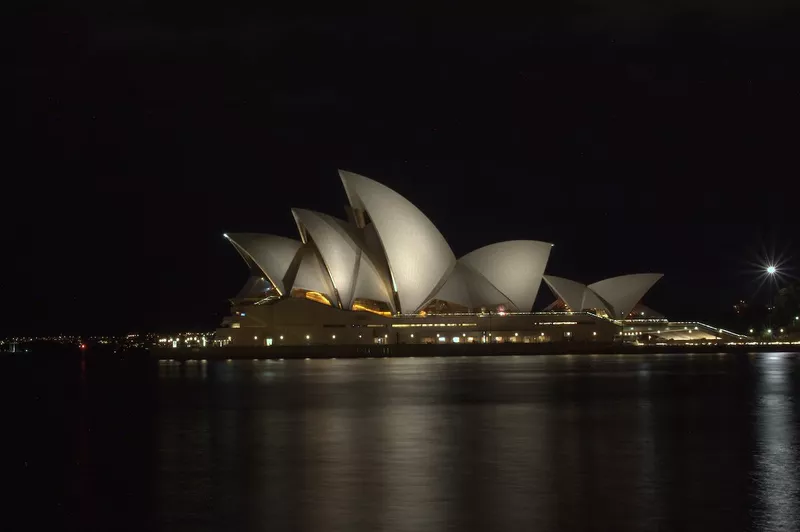
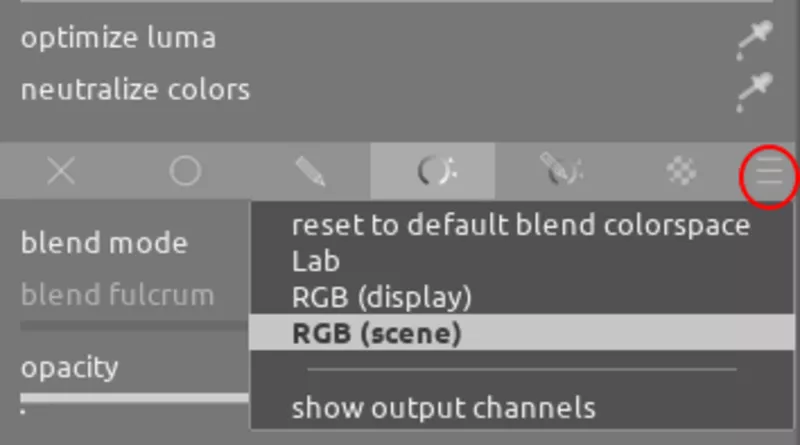
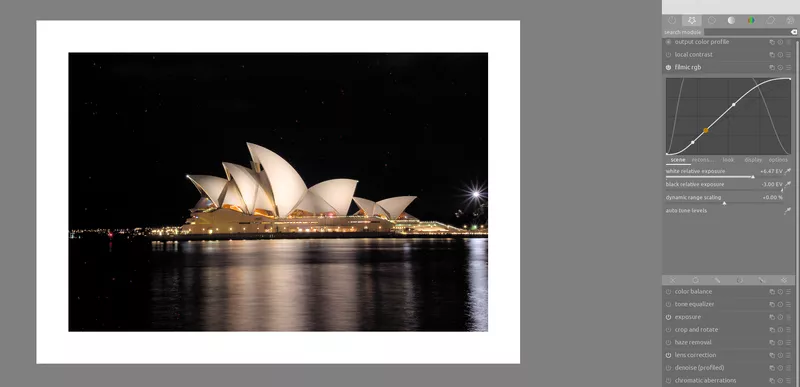
On the filmic rgb module, use the white relative exposure and black relative exposure sliders on the scene tab to adjust the highlights and shadows respectively to recover clipped areas. Once it looks good, hit o to show the clipping warning indicator and set it with these values:
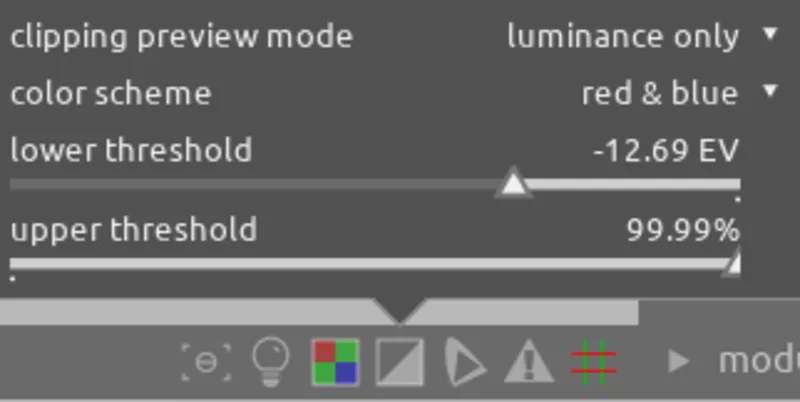
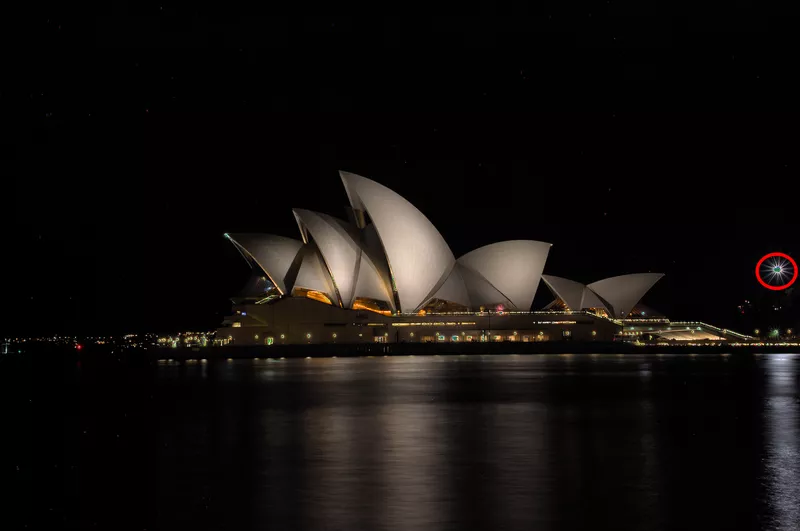
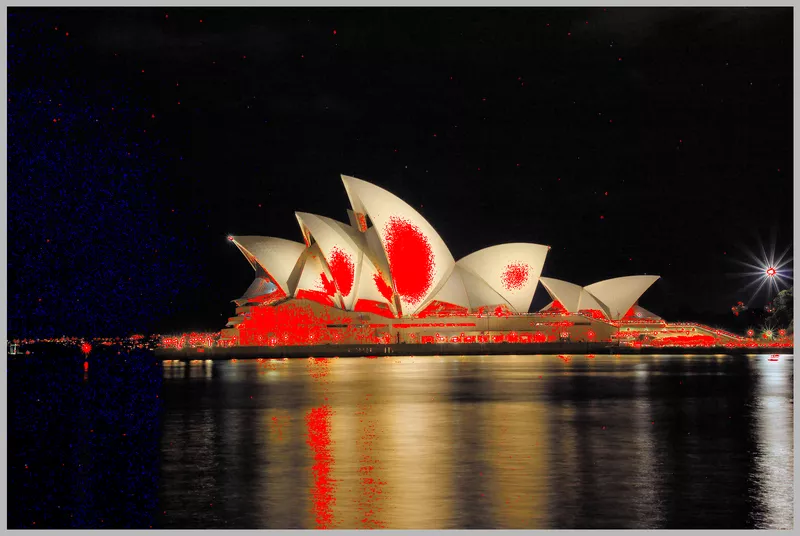
The image will show pixels that are too brightly exposed pixels as red and pixels that are too dark as blue:

In the case of this image, I want to push down the shadows to make the sky uniform and a dark black, so I am not concerned about the clipping seen here. When done adjusting, hit o to hide the clipping warnings. Finally, hit Ctrl+B to hide the color assessment window.
Note
Alternatively, instead of using filmic rgb you can use the sigmoid module. Only enable one or the other at a time and see which one gives a better result for your particular image.
RAW Overexposure Recovery
If you found that parts of the image had clipped highlights in the RAW file that you want to try and recover (recall that SHIFT+O will show you RAW overexposure), click on the reconstruct tab in filmic rgb and follow the reconstruct instructions to recover these clipped highlights.
Dodging and Burning
For fine-tuning exposure in part of the image, use tone equalizer (don't forget to set mask exposure compensation and mask contrast compensation before making adjustments); see this tone equalizer guide, this video, and this module overview for details.
Contrast
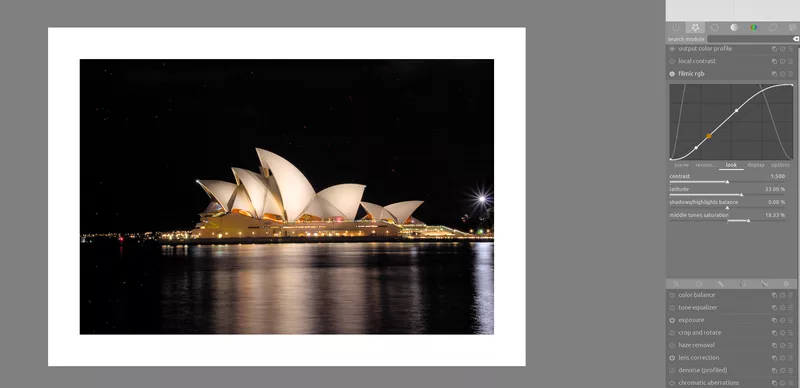
On the look tab of filmic rgb, adjust contrast using the contrast and latitude sliders. You can also use the tone equalizer module for specific contrast adjustments.
I recommend enabling one of the following to increase local contrast:
- the local contrast module is easy to use and often produces good results. Adjust the detail slider as needed
- the diffuse or sharpen module with the fast local contrast or local contrast preset also works well. This module is complex and has a steep learning curve, so start with the aforementioned presets and make minor adjustments (e.g. slowly increase the iterations slider to increase the strength of the effect). See this guide for more details on how to use this module.
- the contrast equalizer module can help boost contrast or conversely soften certain parts of the image, but be careful with how far you push this module because it can create artifacts due to being a display-referred module
Color
White Balance
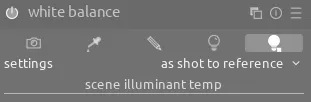
With the settings configured at the beginning of this tutorial, the white balance module should be automatically enabled and configured to use as shot to reference:
This means there is nothing that we need to change in white balance and we can go to color calibration to configure white balance. See the CAT tab workflow section of the manual for how to select an illuminant and set the white balance (in most cases, either selecting the appropriate illuminant for the scene from the illuminant dropdown or using the color picker to select a grey area should work). The adaptation value can likely remain set to the default of Linear Bradford (1985) unless you are working with LED lights or sunsets as noted in this post.
The color calibration module can be used with masks, so you can apply a different white balance on different parts of the image if there are multiple illuminants present. For details on how to use masks to set a different white balance on parts of the image, see this section.
Saturation
Pixels that are out of gamut will be displayed:
Before attempting to adjust these out of gamut pixels, note that some amount of out of gamut pixels is okay. Therefore, unless a large portion of your image is out of gamut or you see sharp transitions where there should be gradients, you likely do not need to do anything to these pixels. Hit o again when done to hide the clipping warning indicator.
You can use the color balance rgb module to increase chroma, saturation, and brillance:
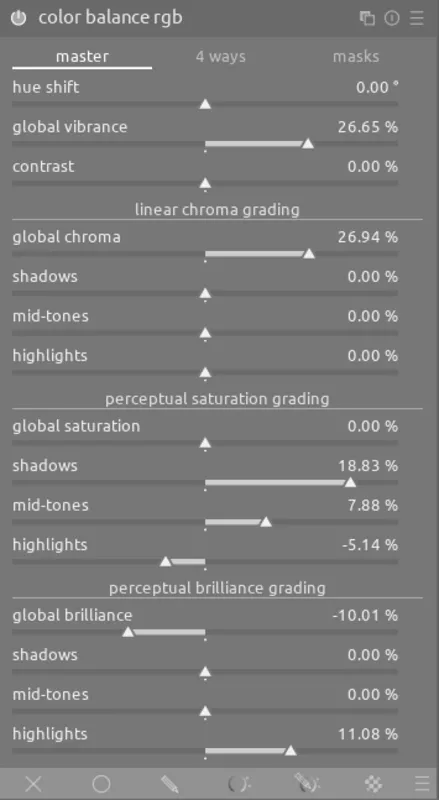
I use these settings as a starting point and adjust from there. The idea here is to add chroma globally, saturation to only the shadows and midtones, and conversly brillance only to highlights to more closely align with how you perceive color (with color less noticable in the highlights).
Color Adjustments
For other color adjustments, use one or more of these modules to make adjustments (including artistic changes):
- color equalizer - easily adjust the hue, saturation, and brightness for specific color ranges on the image; see here for details
- rgb primaries - this is much easier than a traditional channel mixer so is a good first choice
- the channel mixing tabs of color calibration
- color balance rgb
- color look up table (but prefer the other modules when possible)
Remember, you can make multiple instances of any of these modules and apply them to different parts of the image using masks.
Black and White
Tip
For dramatic black and white images, I've found sigmoid works better than filmic rgb; see this guide for details.
For converting an image to black and white, use one of these options:
- color calibration using the grey tab; see this black and white tutorial for more details
- lut 3D with a black and white LUT; some collections of free LUTs are available on this page
Correction
Use the following modules to perform corrections on the image as needed:
- use the crop and rotate and perspective modules to adjust crop, rotation, and perspective
- you can use diffuse or sharpen module with the dehaze preset to remove haze from landscape scenes. Alternatively, you can also use haze removal but diffuse or sharpen is now preferred
- enable denoise (profiled) if necessary to correct noise (the default settings should handle both chroma and luma noise)
- for these specific issues, use chromatic aberrations or hot pixels (this image has many red hot pixels in the sky)
- use retouch to remove red-eye or other unwanted objects from the image (more details in this retouch tutorial)
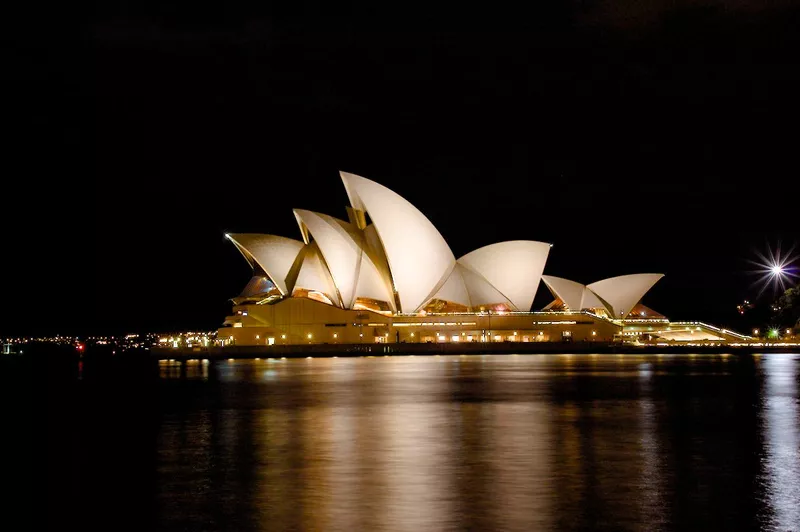
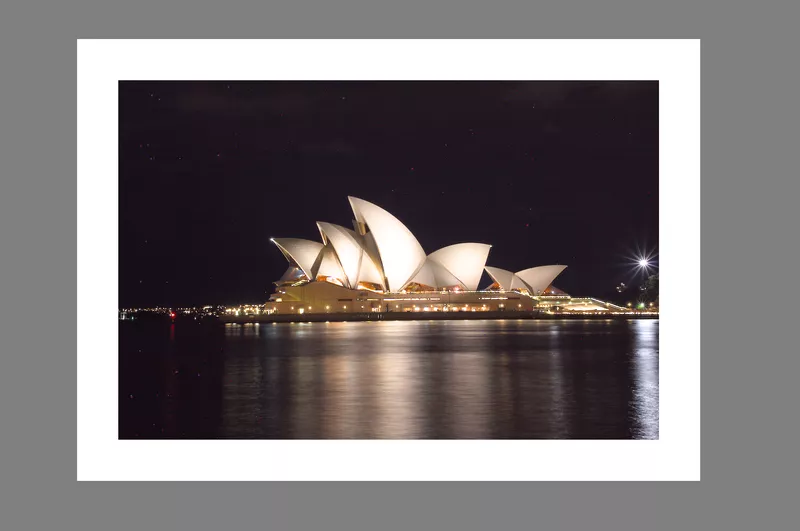
Final Image