It's hard to overstate the power of the tone equalizer module in darktable: it can perform tone adjustments on the whole image or only a certain luminance range and preserve details throughout the process. This module has a lot of options, which can seem intimidating at first (especially if coming from Adobe Lightroom), so let's look at several example images to see how to use it.
Tip
I'd also recommend this excellent video by Boris Hajdukovic which covers the tone equalizer module in great detail. For additional information, review the module documentation.
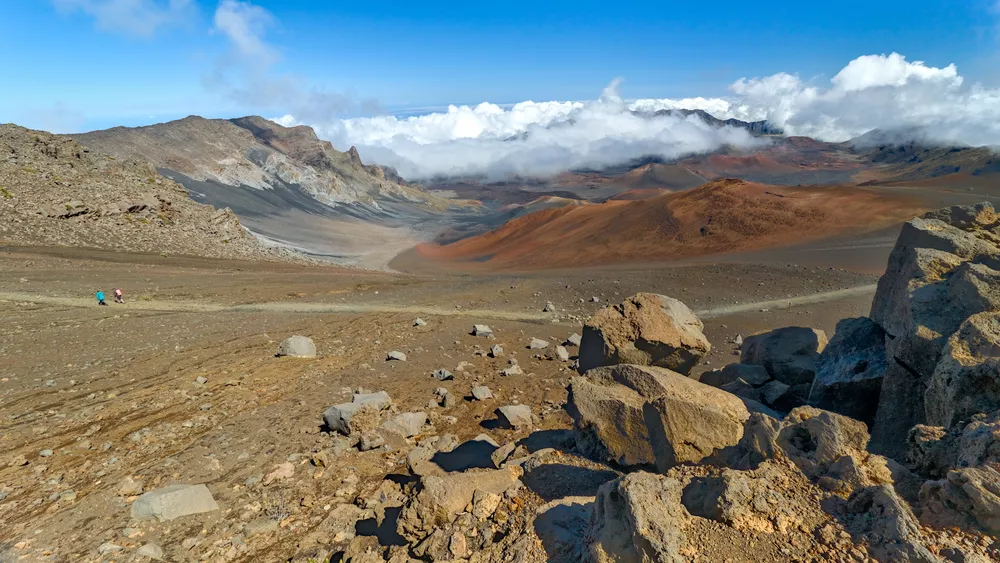
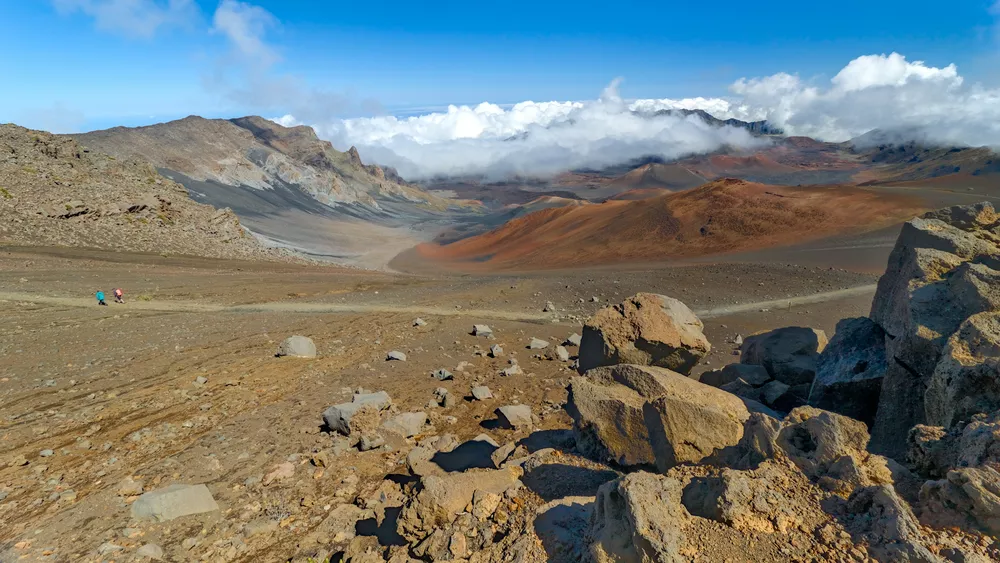
Haleakalā and Harsh Shadows
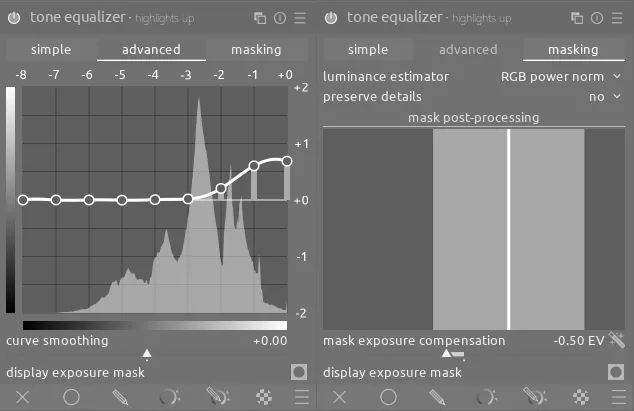
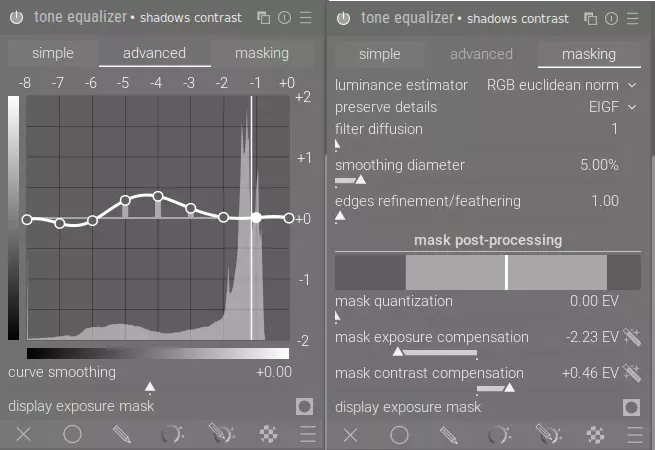
Standing above the clouds at an altitude of over 10,000 feet, the light is very harse with less atmosphere or clouds to diffuse it. This can create intense shadows, which may throw off the balance of your composition. Fortunately, the tone equalizer module makes harsh shadows easy to correct, no matter the altitude. First, go to the masking tab to make sure that the mask includes all of the shadows, even the deepest shadows; this likely means you'll need to push the light gray mask post-processing bar to the right as seen below (or even farther):
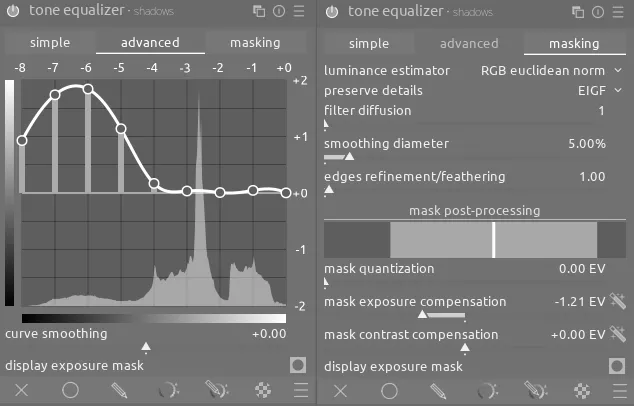
Once you have the mask set, visit the advanced tab and pull up the darkest EVs to create a smooth curve and bring the shadows out of the deep dark created by the harsh lighting. While you don't want to push it too far (these still are shadows after all), it gives the viewer a sense of some of the details.
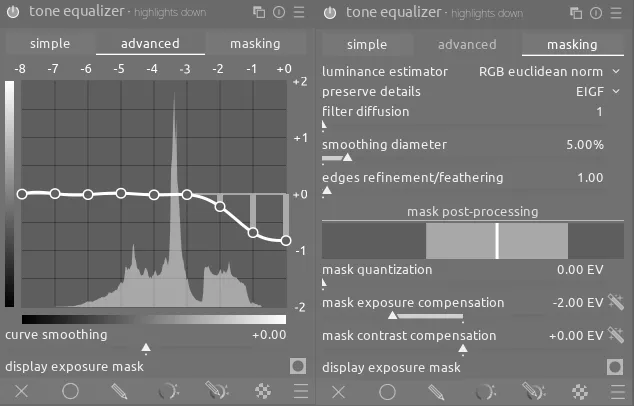
The second adjustment, which you'll see repeated throughout this tutorial, is to extract more details from the highlights using the following formula with two instances of tone equalizer:
- first instance: pull down the highlights while preserving details using EIGF or guided filter for the preserve details dropdown on the masking tab; because we are compressing the highlights into a smaller space (temporarily), we need to preserve the details so they aren't lost. Make sure there's enough room in the mask (again see the mask post-processing gray bar on the masking tab) to represent all the highlights, and pull the brightest EVs down on the advanced tab:
- second instance: use the simple tone curve preset, which will set preserve details to no, again make sure the mask has room for all the highlights, and then pull the brightest EVs up on the advanced tab:
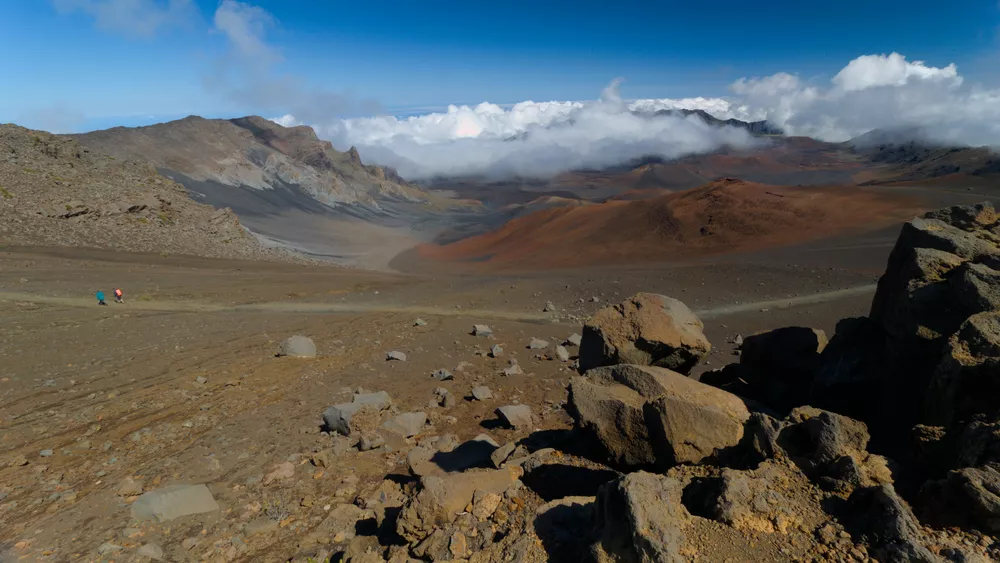
You can see how this has a subtle, yet important effect on the details (look especially at the dark gray area in the upper-left third of the image or the clouds in the middle):
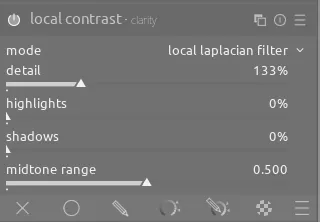
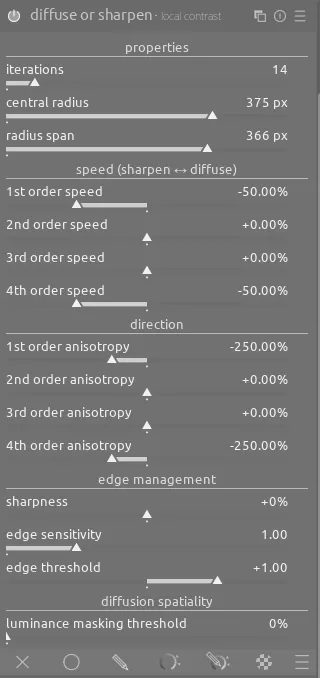
Finally, I used an instance of local contrast and an instance of diffuse or sharpen to add some local contrast globally. Normally I'd use one or the other of these modules for local contrast (but not both simultaneously), but in this case I like how they look together:
Details in The Snow and Contrast In The Shadows
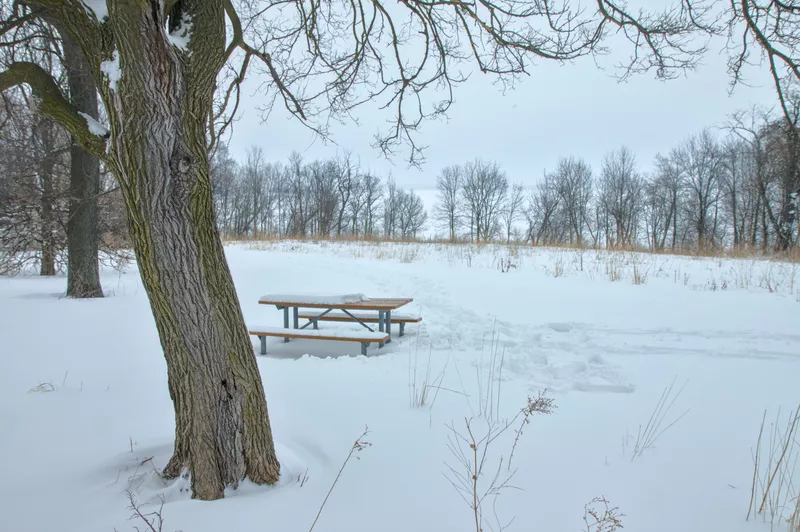
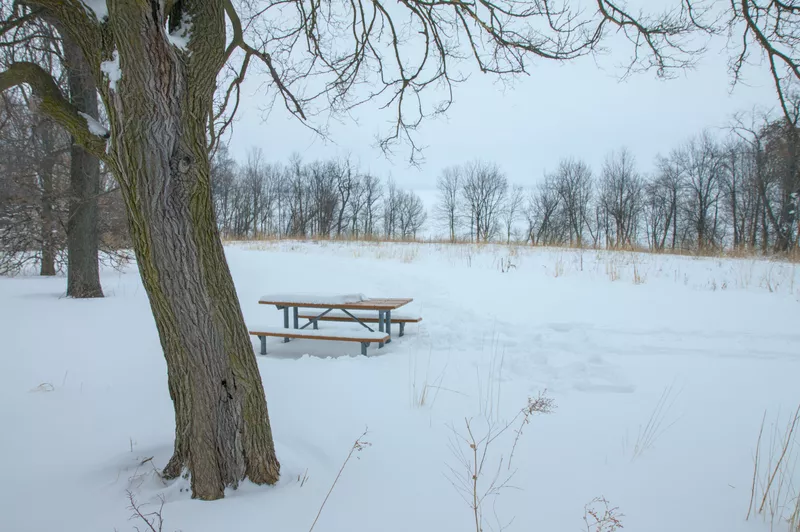
Images with snow can often result in the light meter in your camera getting confused about what the correct exposure should be since so much of the scene is bright white. That is true here, however simply enabling the exposure module and increasing it will brighten up the scene globally. The snow still looks rather flat, and I think the scene could use more contrast to bring out the details.
We want to do two things with this scene:
- use the above two-step process to enhance the contrast in the highlights. This will bring out more of the details, such as the tracks approaching the picnic table and receeding into the background
- use an instance of tone equalizer and apply an "S" curve to the shadows to create more contrast in the bark of the tree:
A Lighthouse in The Mid-Day Sun
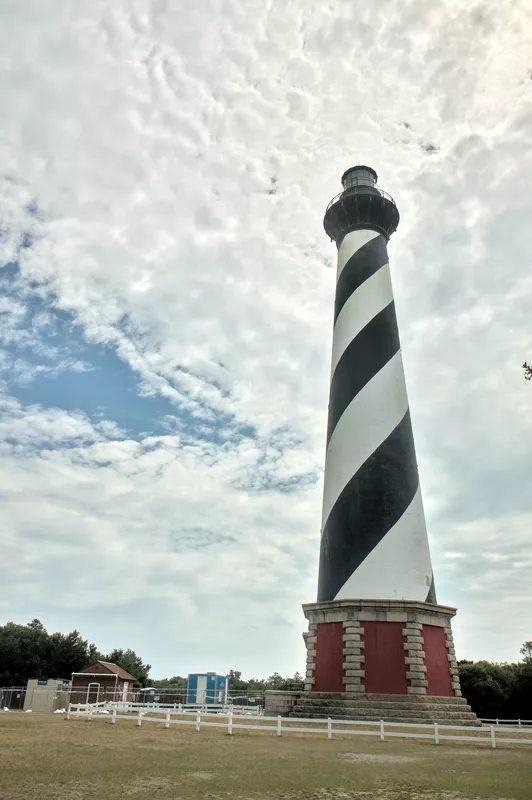
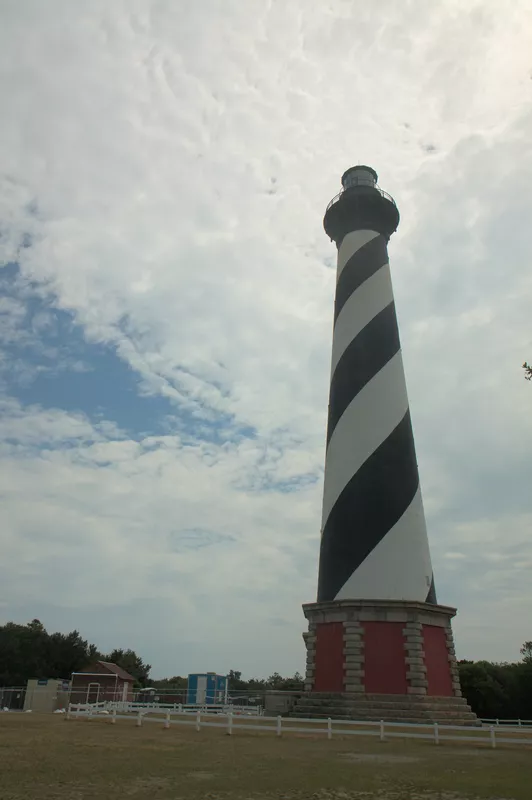
This is a challenging scene - shooting your camera directly into the sun while not being able to block the intense light coming directly from the sun. Fortunately, the clouds provide some amount of diffusion. The sky is already very bright, so we need to be careful to not affect it (and cause clipping) when adjusting the rest of the scene. Once again, tone equalizer makes this easy:
However, as you attempt to brighten the image, you'll see that the top of the lighthouse is washed out; this detracts from our image since the lighthouse is the main subject:
To work through this, let's make a gradient mask with a subset of luminance values in a parametric mask to cover just the top of the lighthouse:
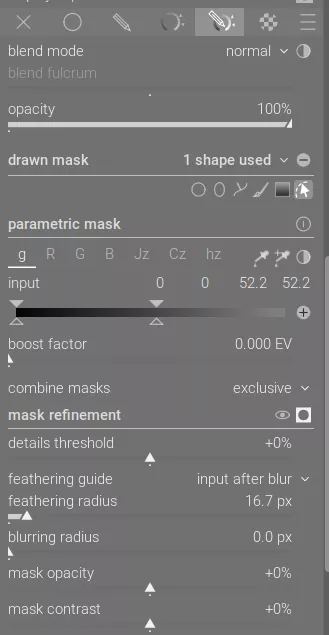
The mask looks like this:

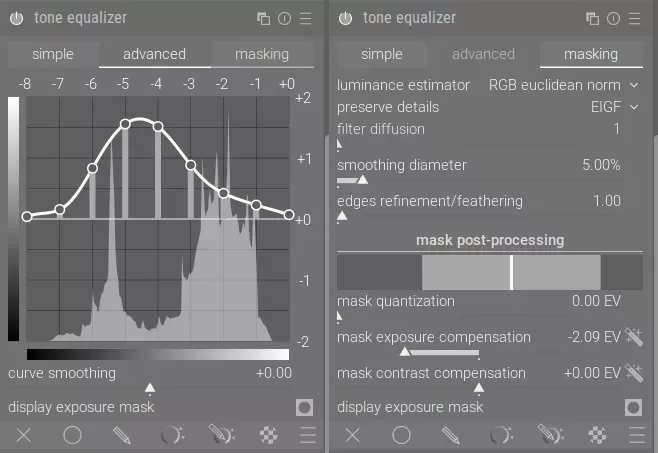
Once that is done, we can use the instance of tone equalizer with this mask to darken both the shadows (the dip in the middle) and the white parts of the lighthouse (the second hump) without affecting anything else:
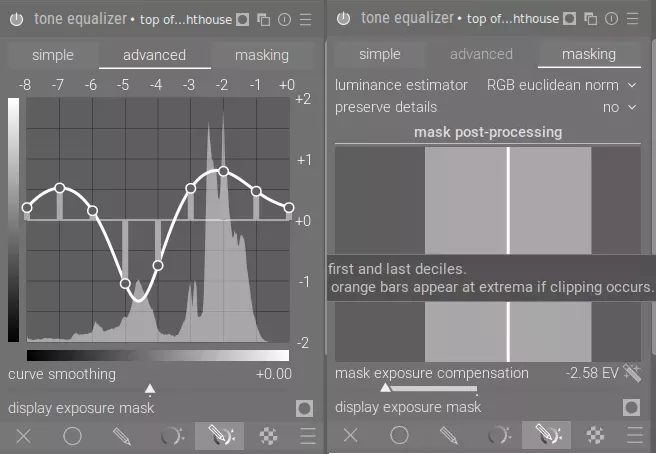
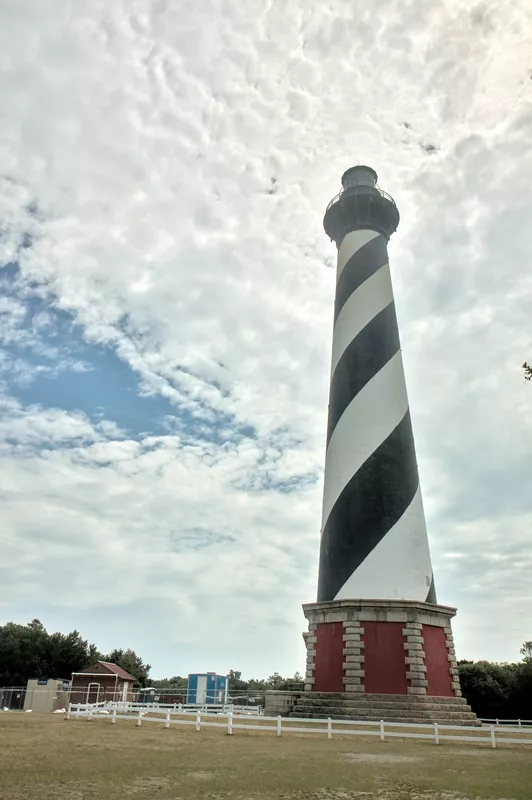
Finally, use the same two-step process described above to pull down and then push up the highlights, dramatically enhancing the texture in the clouds. The result is the significantly-improved image (see the before and after at the beginning of this section).
Conclusion
The tone equalizer module works in conjunction with your camera to not only create a correct exposure, but to selectively adjust parts of the scene in post-processing. This is especially useful in scenes with high dynamic range, where you can't simply increase the exposure without blowing out part of the image. While it may seem intimidating at first, practice using the tone equalizer module on several images and it will quickly become an indispensable tool in your photography toolbox.