Let's review a few case studies to see how to use the powerful new AgX module in darktable.
Blue Bird
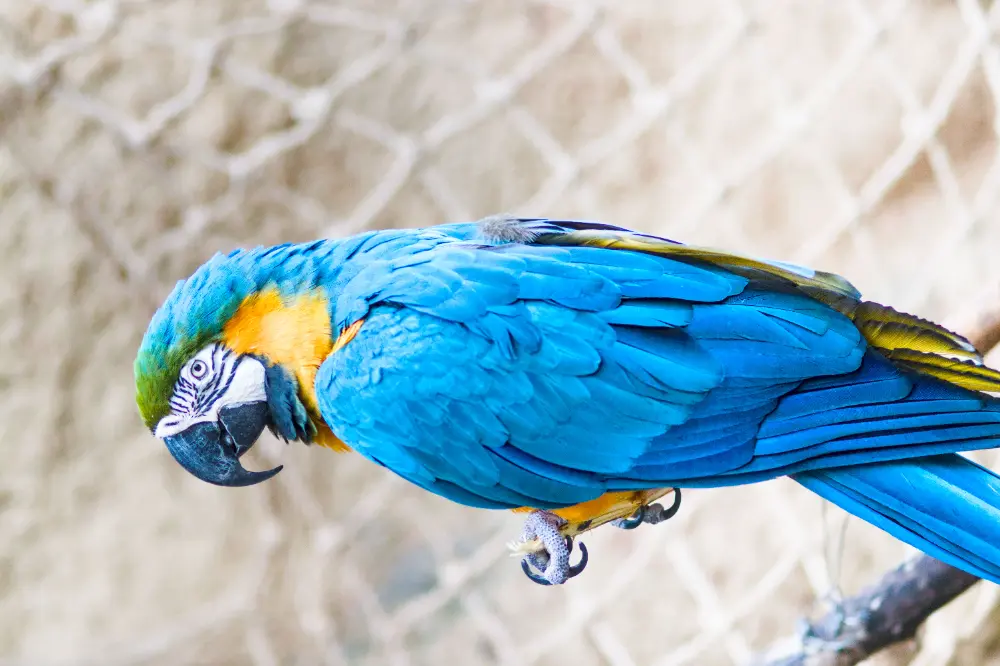

Let's see how to adjust the contrast and colors in this bird photo.
Shoulder Power

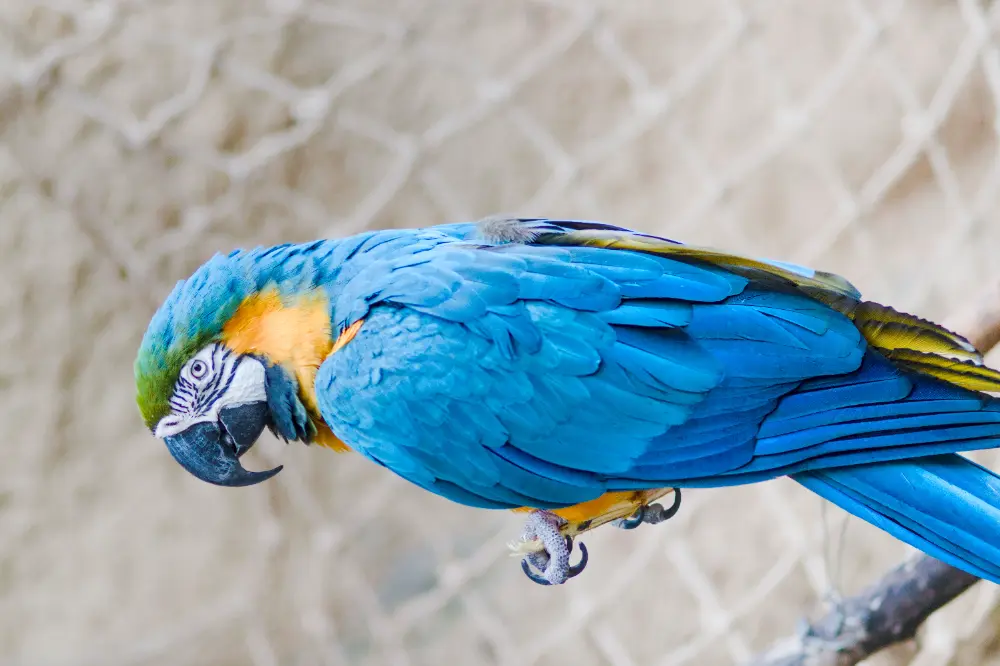
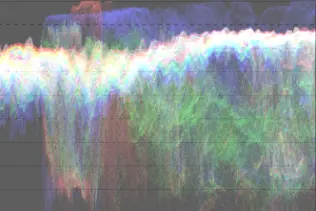
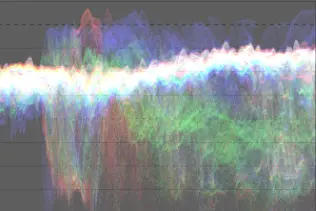
This is a good example of how the shoulder power slider allows for precise control of the highlights. As seen above, setting shoulder power to 4.0 helps the image to pop. I think it's useful to look at the before and after of the histogram too to help visualize this change:
Preserve Hue
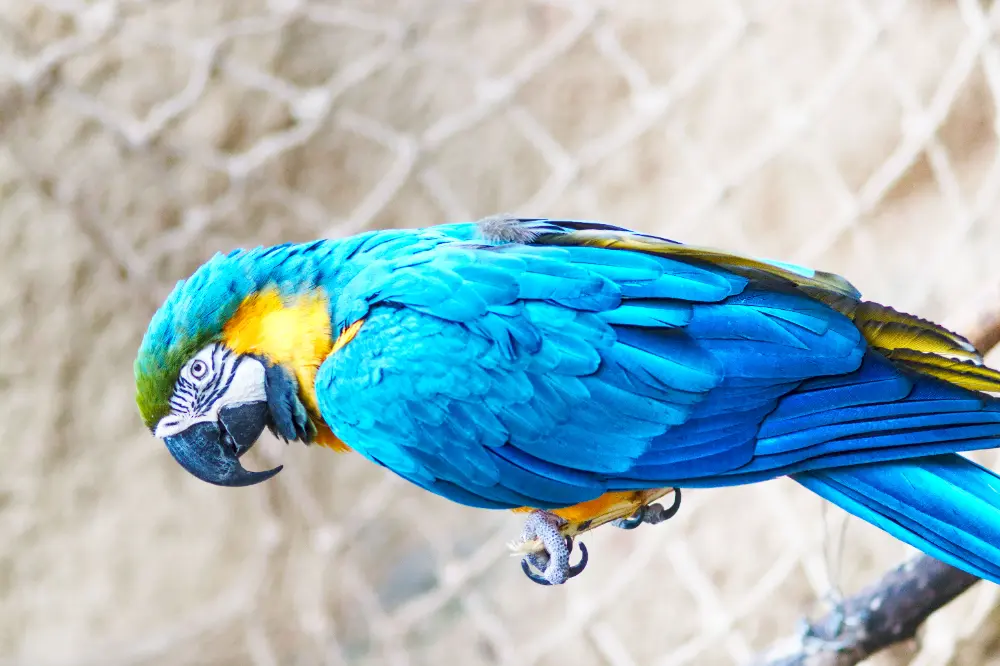
This image is also a striking demonstration of why the preserve hue slider is so useful. As seen above, with no hue preservation we see the Notorious 6 both in the blue and yellow feathers. As we've discussed previously, it's incredibly useful to be able to fine-tune how much we correct for this effect.
Snowy Scene With Bush
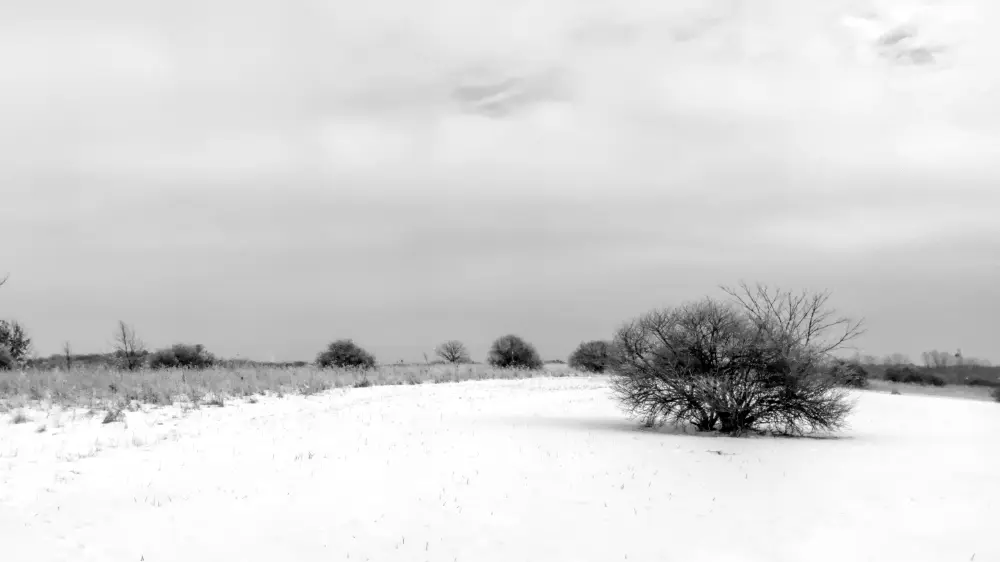
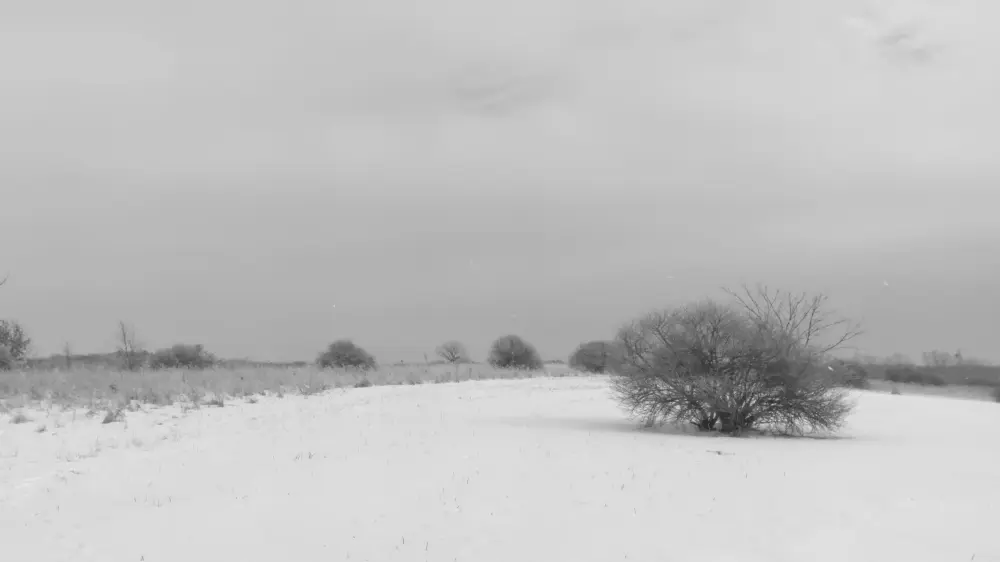
Snowy scenes are difficult to work with because you want to make the snow as bright as possible (as it appears in real life) while not clipping details. Once again, this is where AgX's precise control over the shoulder helps - in this case we want to set shoulder power and shoulder start as follows:
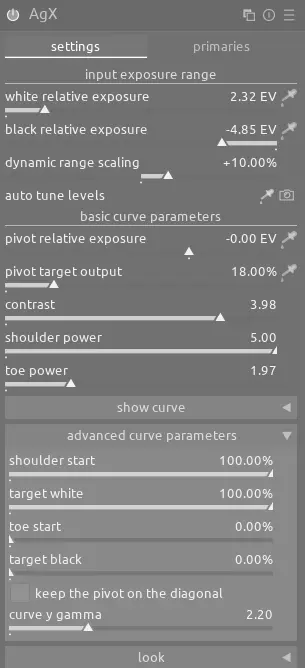
For this type of black and white scene, it's also helpful to increase the contrast slider.
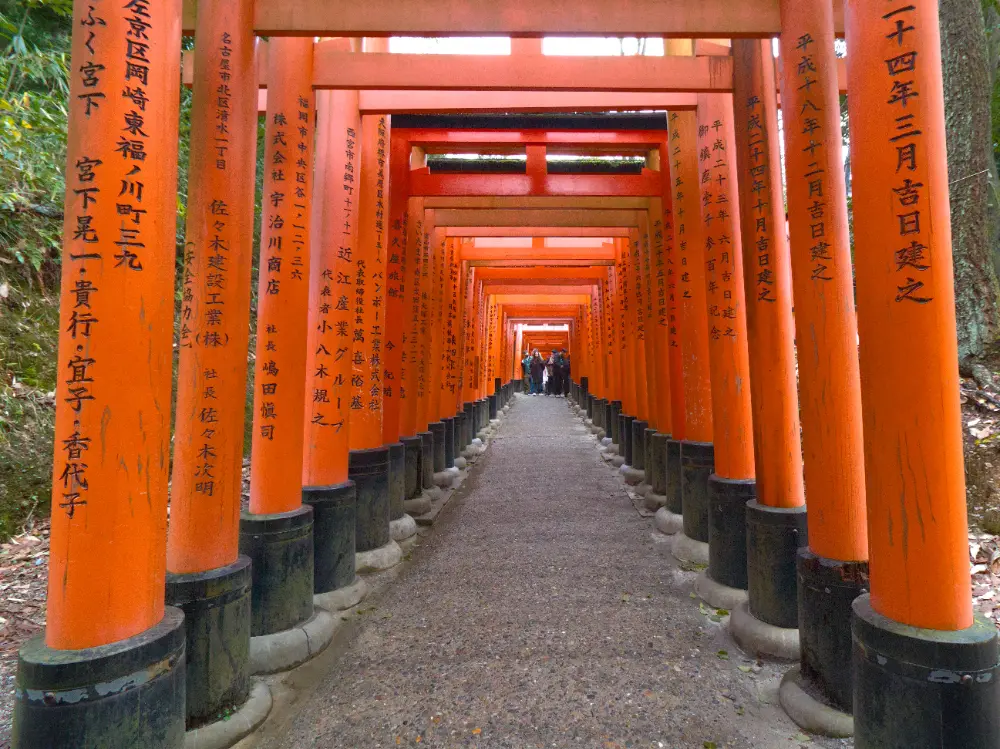
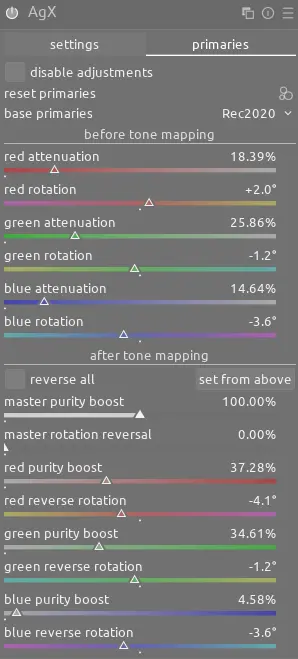
Torii Gates
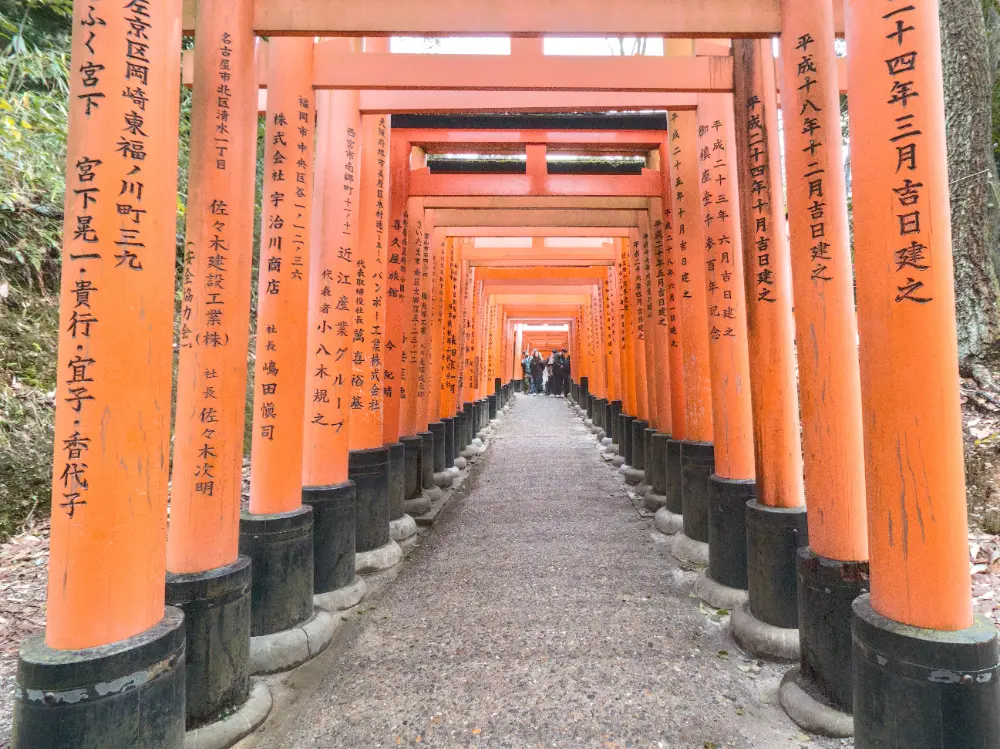
The "before" image of these Torii gates is over-saturated. Fortunately, the red attenuation slider allows us to precisely adjust the saturation to achieve a more natural look:
In addition, after enabling AgX, we see a hue shift in the bright parts of the Torii gates towards yellow:
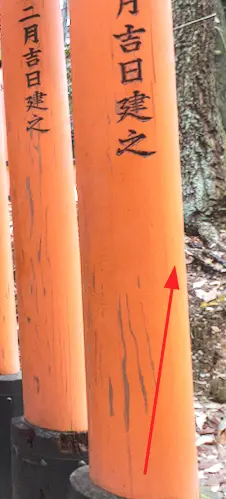
Once again, the preserve hue slider helps correct this shift (65% works well here).
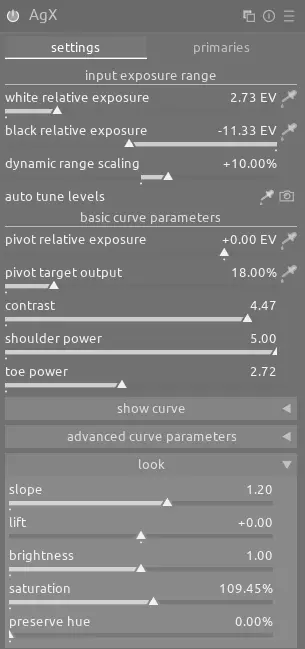
Sunset
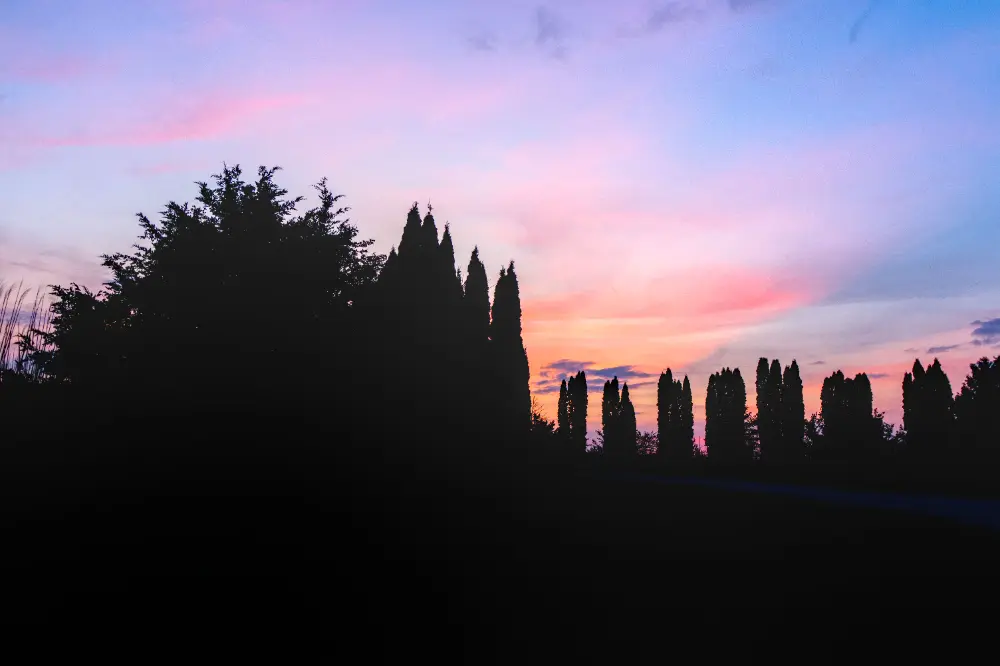
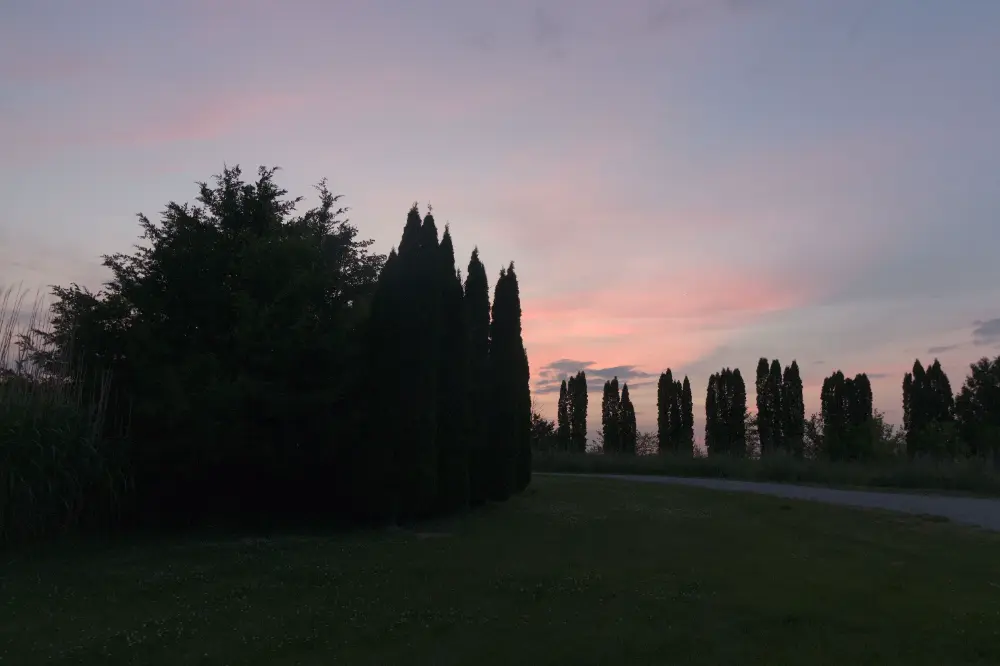
We can use contrast, slope, and shoulder power to really brighten the sky. Conversely, toe power is very useful in this scene to hide distractions in the foreground and create a more true silhouette. We can increase the saturation slider to add more color to the sky too. In this case, we do NOT want to use preserve hue as the slight orange tint to the highlights is pleasant:
We can also use an instance of color balance rgb to add some blue to the midtones in the sky:

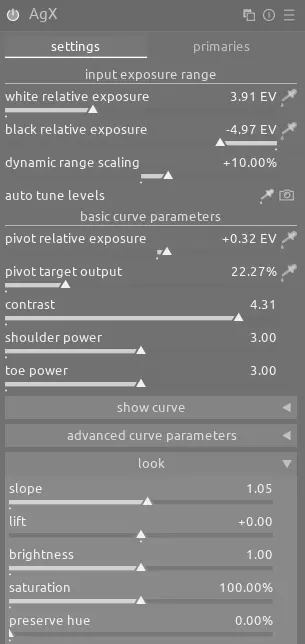
Rhino
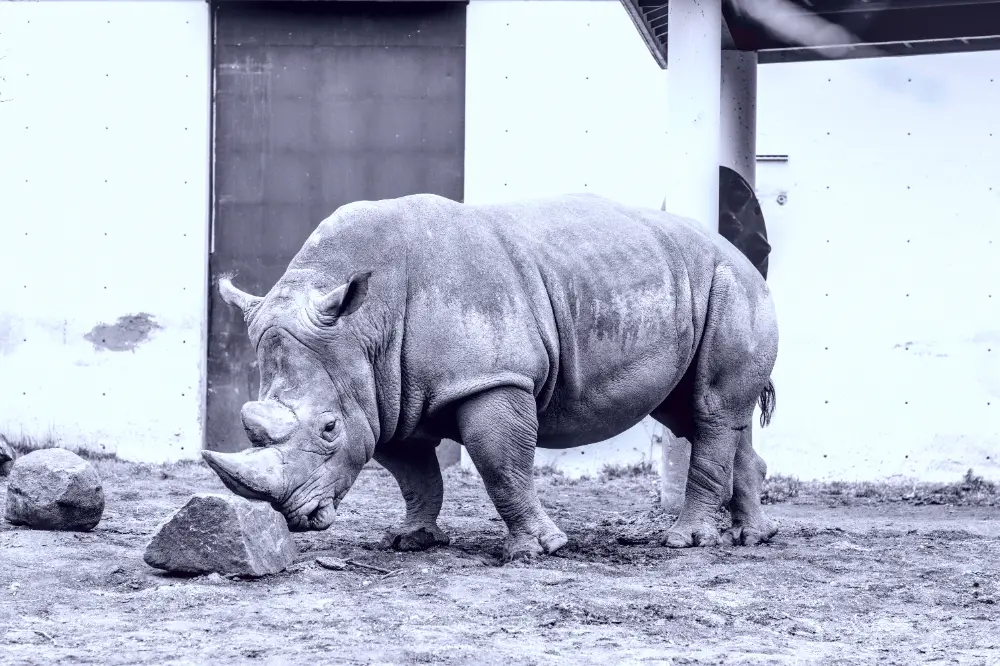
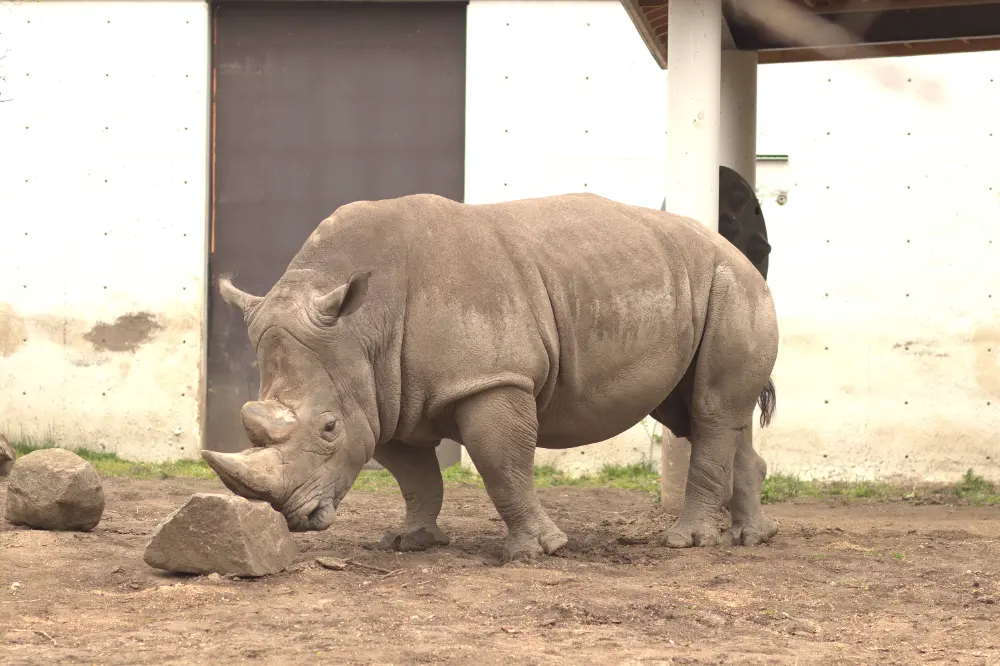
This is another good example of how AgX works with black and white images, using contrast and slope to increase the contrast. In addition, use shoulder power and toe power to help bring out the texture of the rhino:
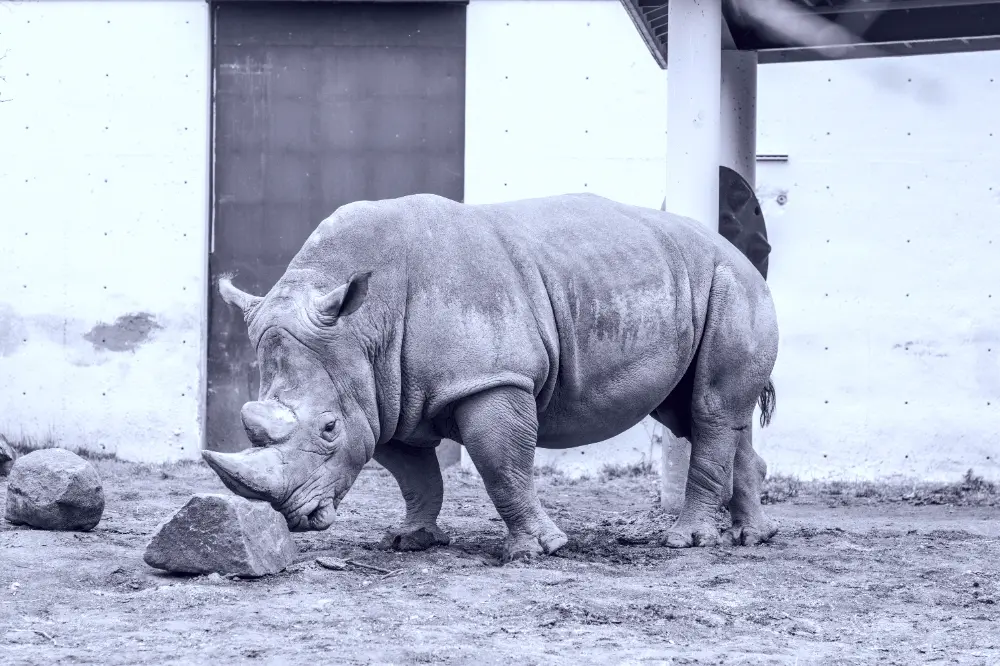
See the specific settings below:
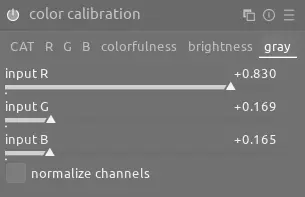
You can convert this image to black and white using color calibration and then add a tint using colorize and the color blend mode:

Conclusion
These examples demonstrate how AgX's precise control over the curve and color allows you to easily develop a wide variety of images with challenging attributes.