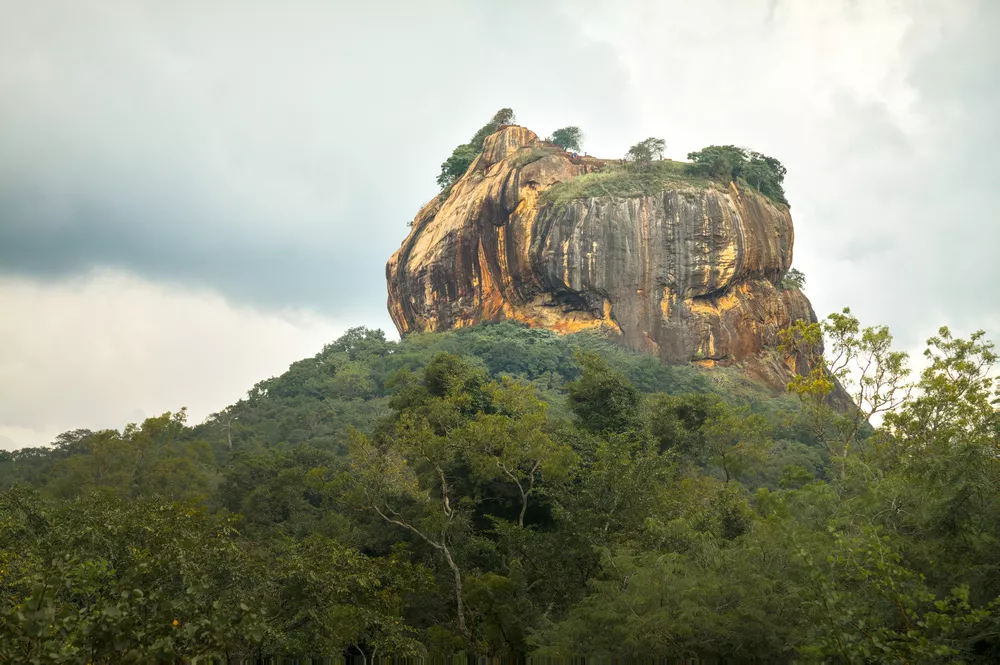
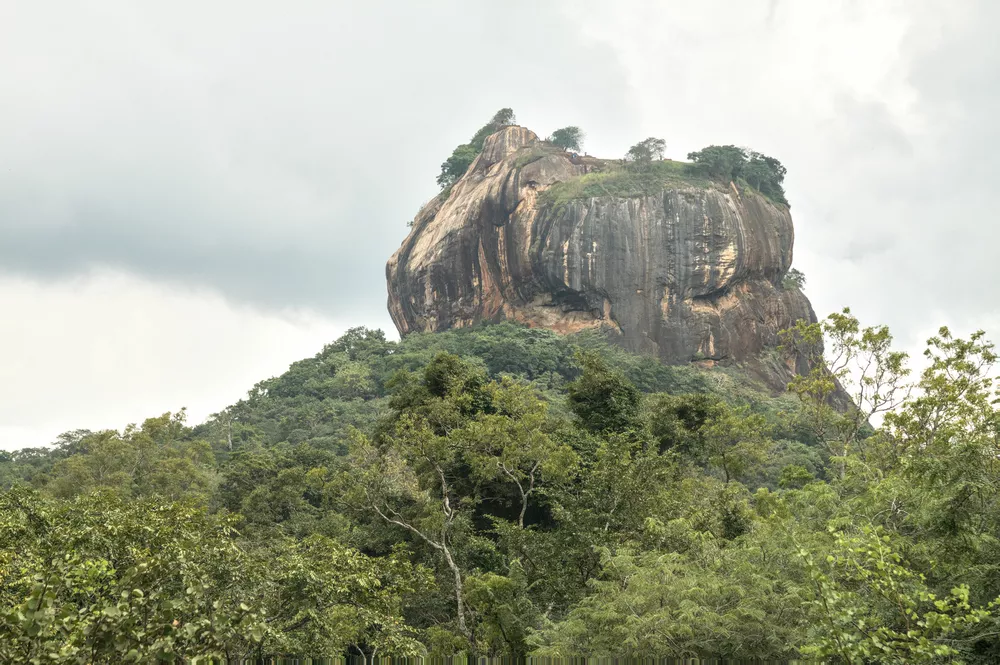
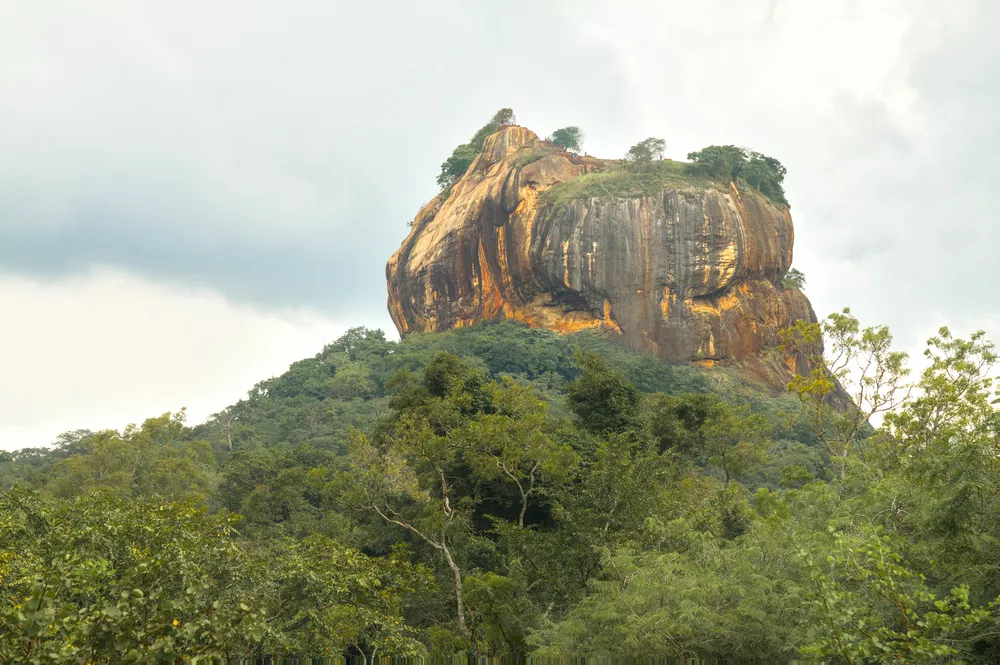
The mighty Sigiriya rises from the surrounding plains in dramatic fasion. This UNESCO World Heritage site is both impressive and beautiful to see. Let's look at how to bring out this beauty and detail in darktable. Before starting, it's worth taking a minute to appreciate the scale of this site. The above image might be too small to see it, but notice how tiny the people are standing on top of this massive rock:

Global Adjustments
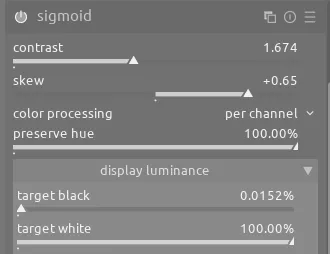
For this image, I want to use sigmoid as the tone mapper as it does a really good job of enhancing contrast which will help bring out the details in the rock (adjusting the skew slider until the effect looks good):
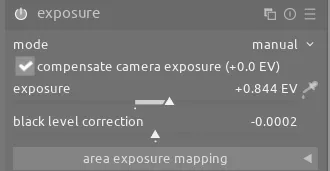
Next, I'll use the exposure module to adjust the overall scene:
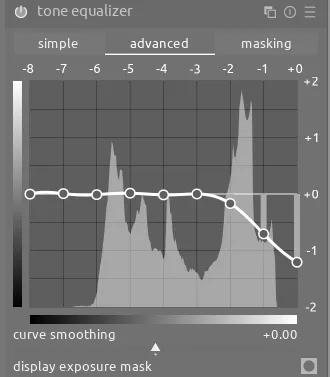
One limitation of sigmoid compared to filmic rgb is it doesn't constrain the highlights, so I'll use an instance of tone equalizer to pull down the highlights:
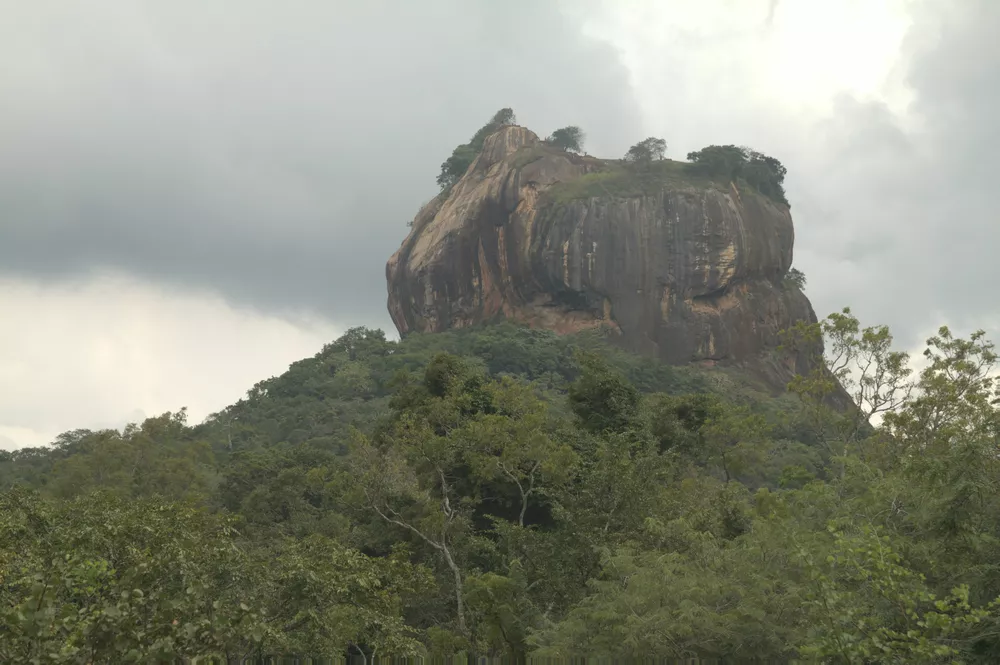
We can also use local contrast and diffuse or sharpen to further enhance contrast and sharpness (respectively). The overall result of these global adjustments is shown below:
Finding Focus
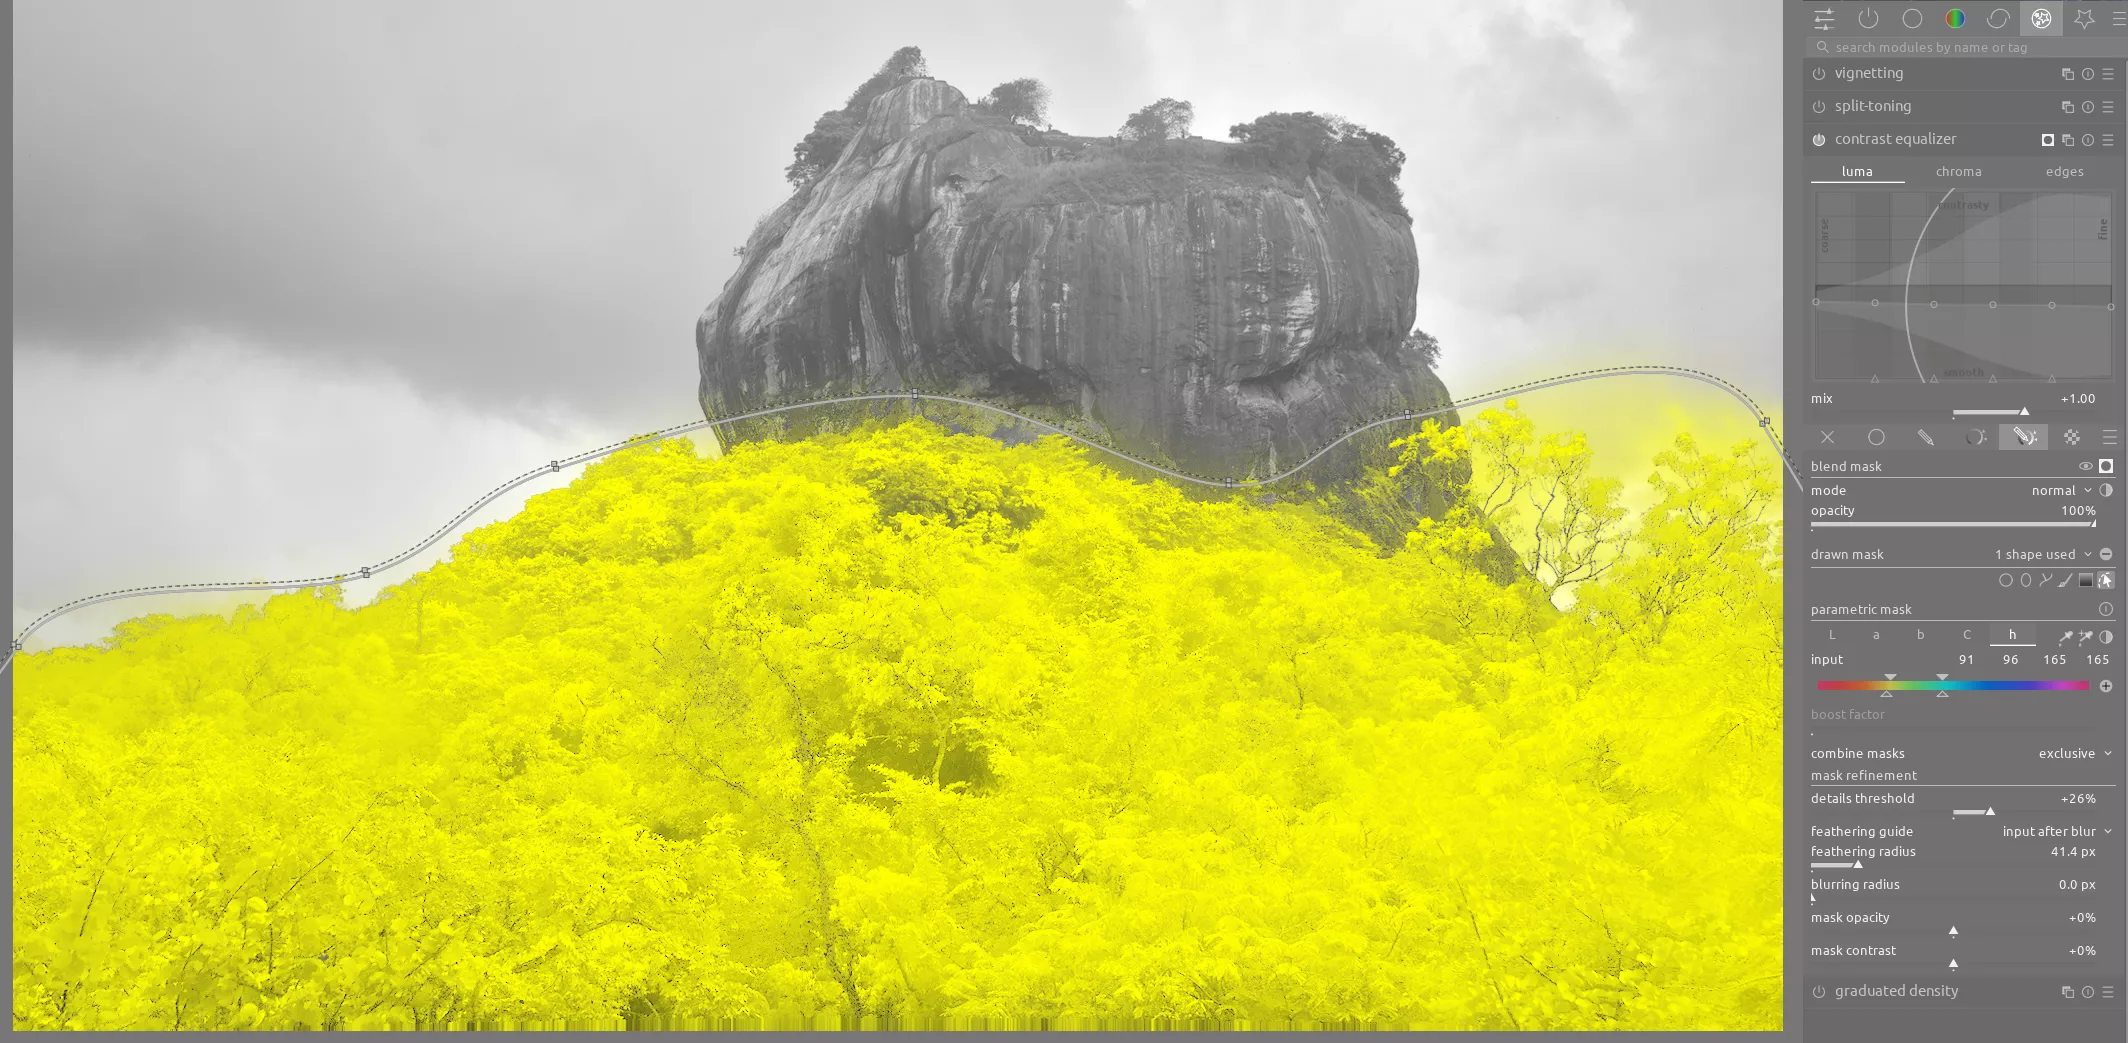
At this point, I want to think about setting the focus of the scene; we can do this by creating contrast in brightness, color, and detail. First, let's use contrast equalizer with a mask on the green foliage and reduce the details:

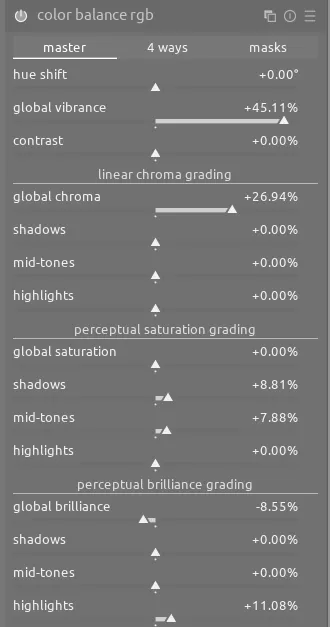
Now let's use two instances of color balance rgb - one that makes overall adjustments to color and contrast:
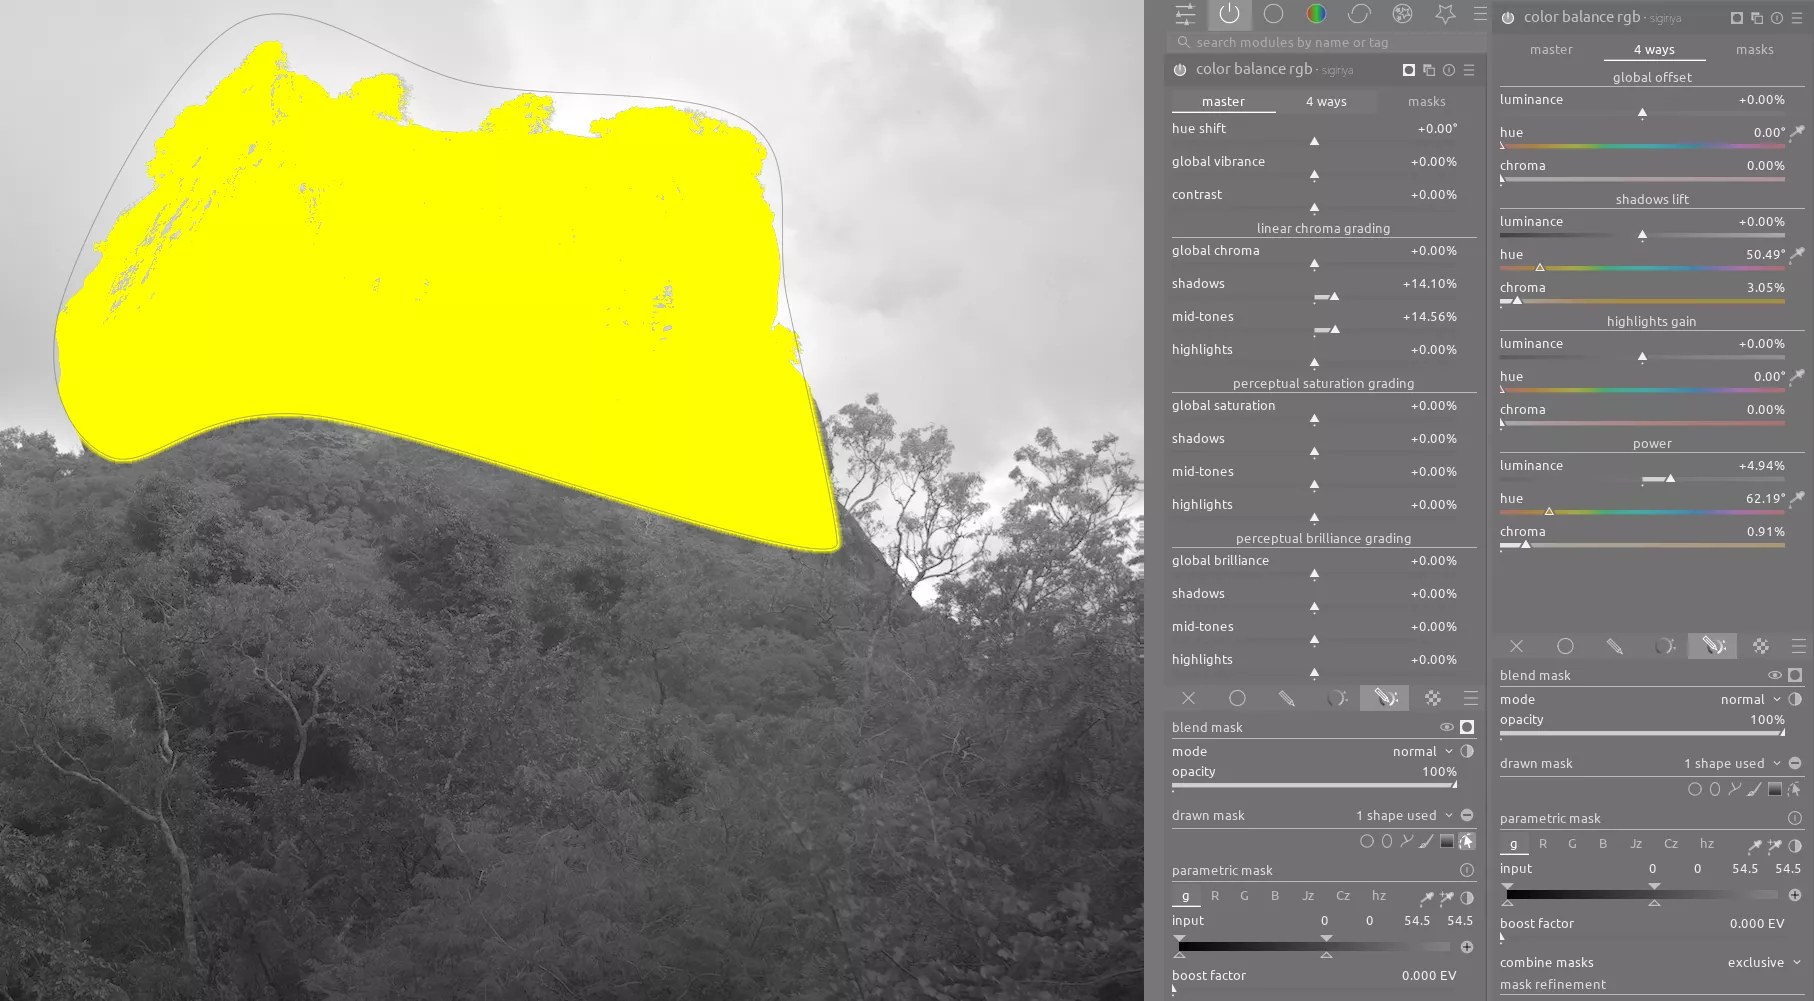
And a second instance with a mask to just enhance the yellows and browns on Sigiriya:
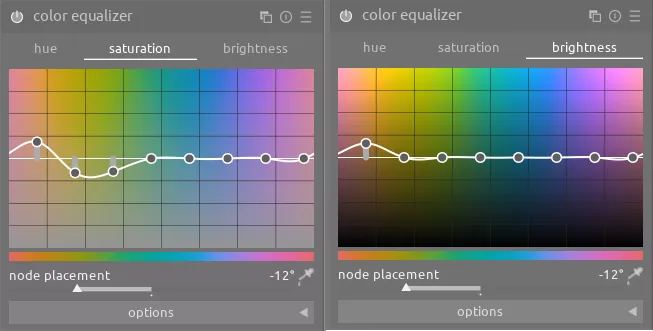
Let's use color equalizer to desaturate the leaves and trees surrounding Sigiriya and increase brightness and saturation on the rock itself:
These changes cumulatively have a significant impact:
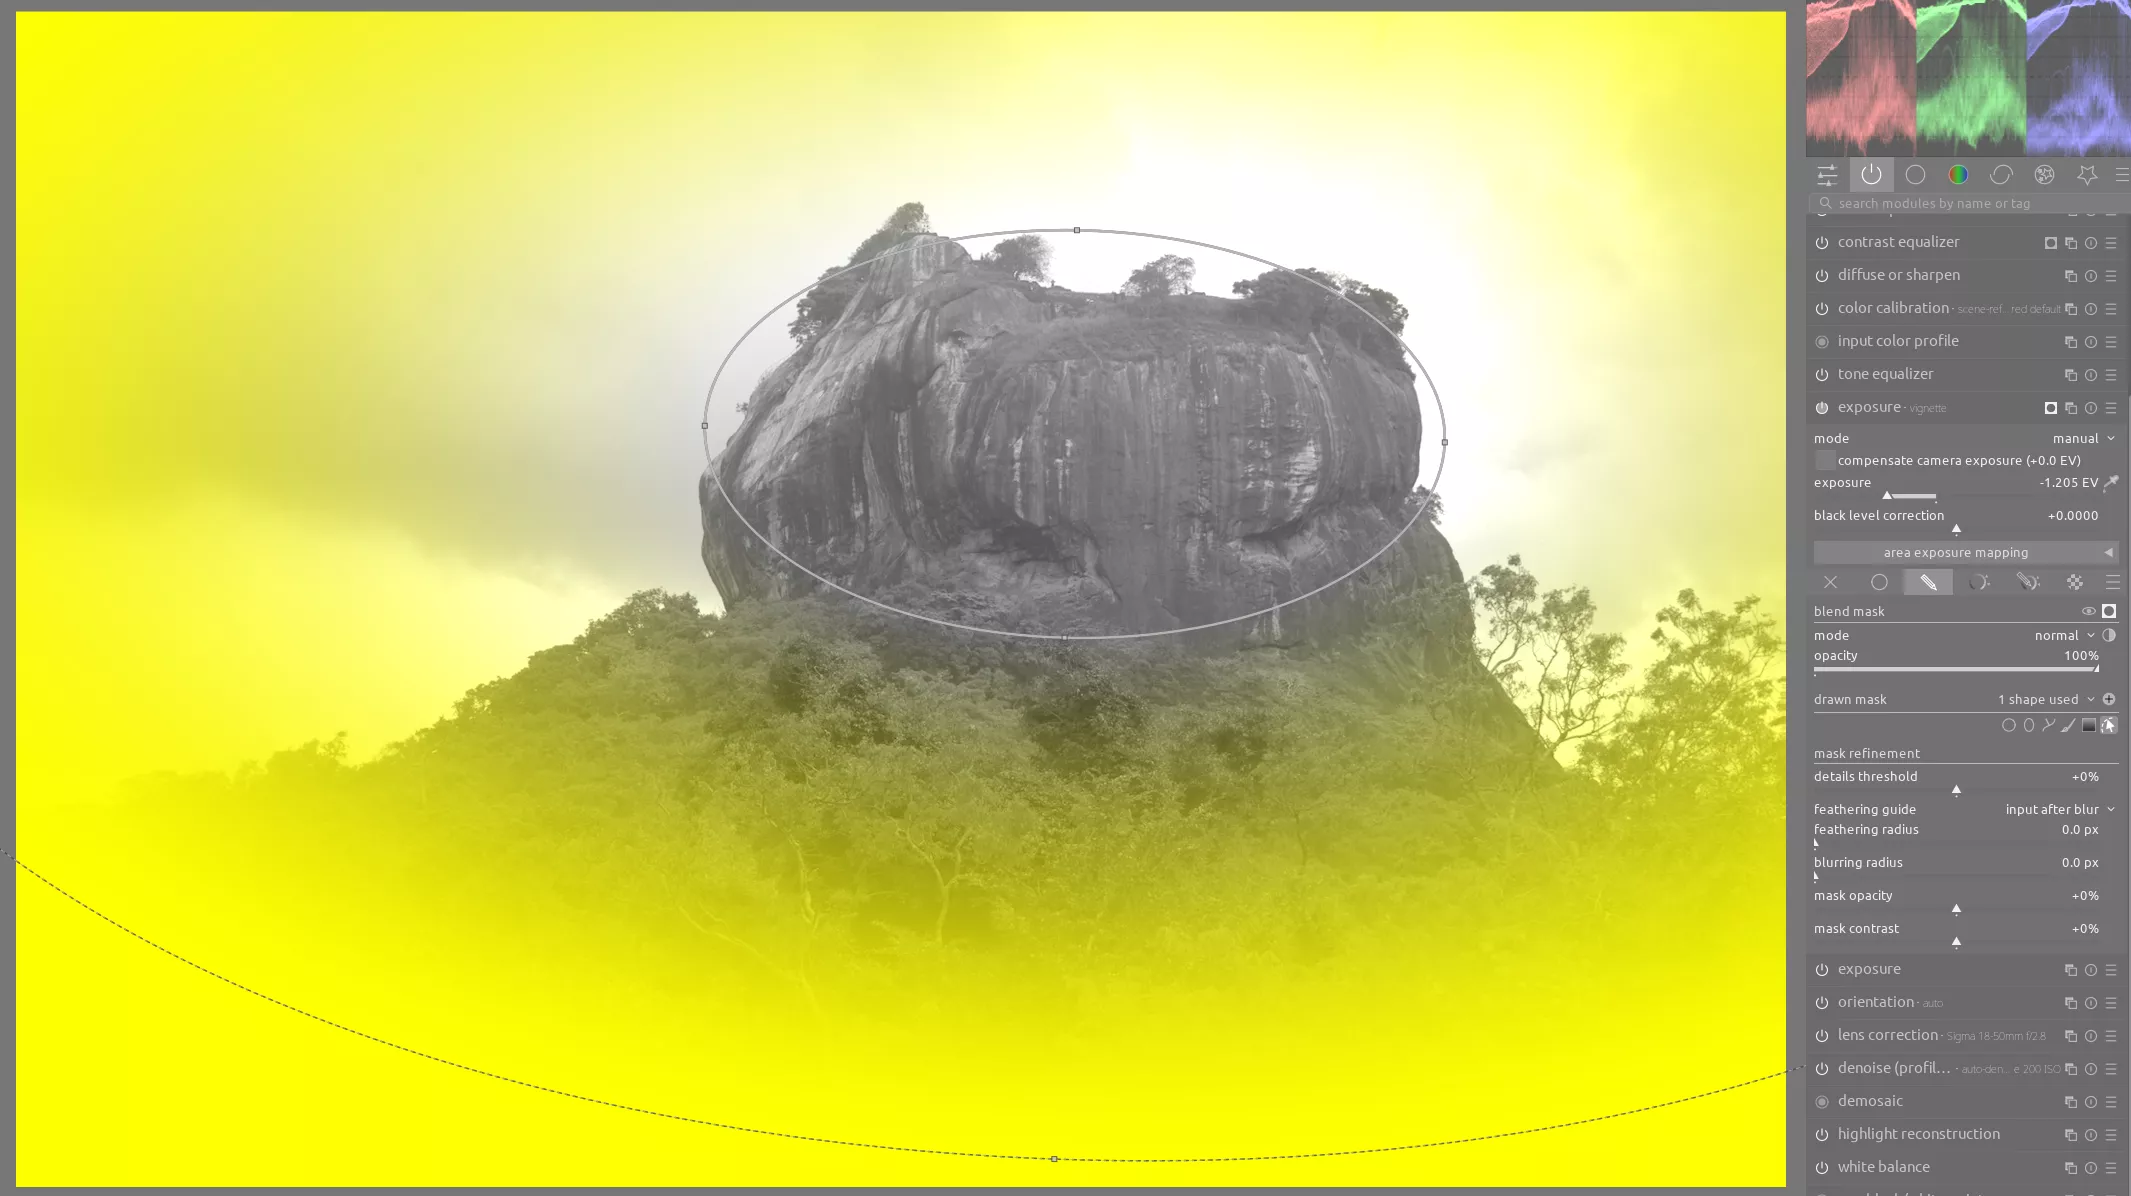
Now, let's add a vignette using another instance of exposure to direct attention to Sigiriya. In particular, notice how large the feathering circle of the mask is to provide a very gradual transition:
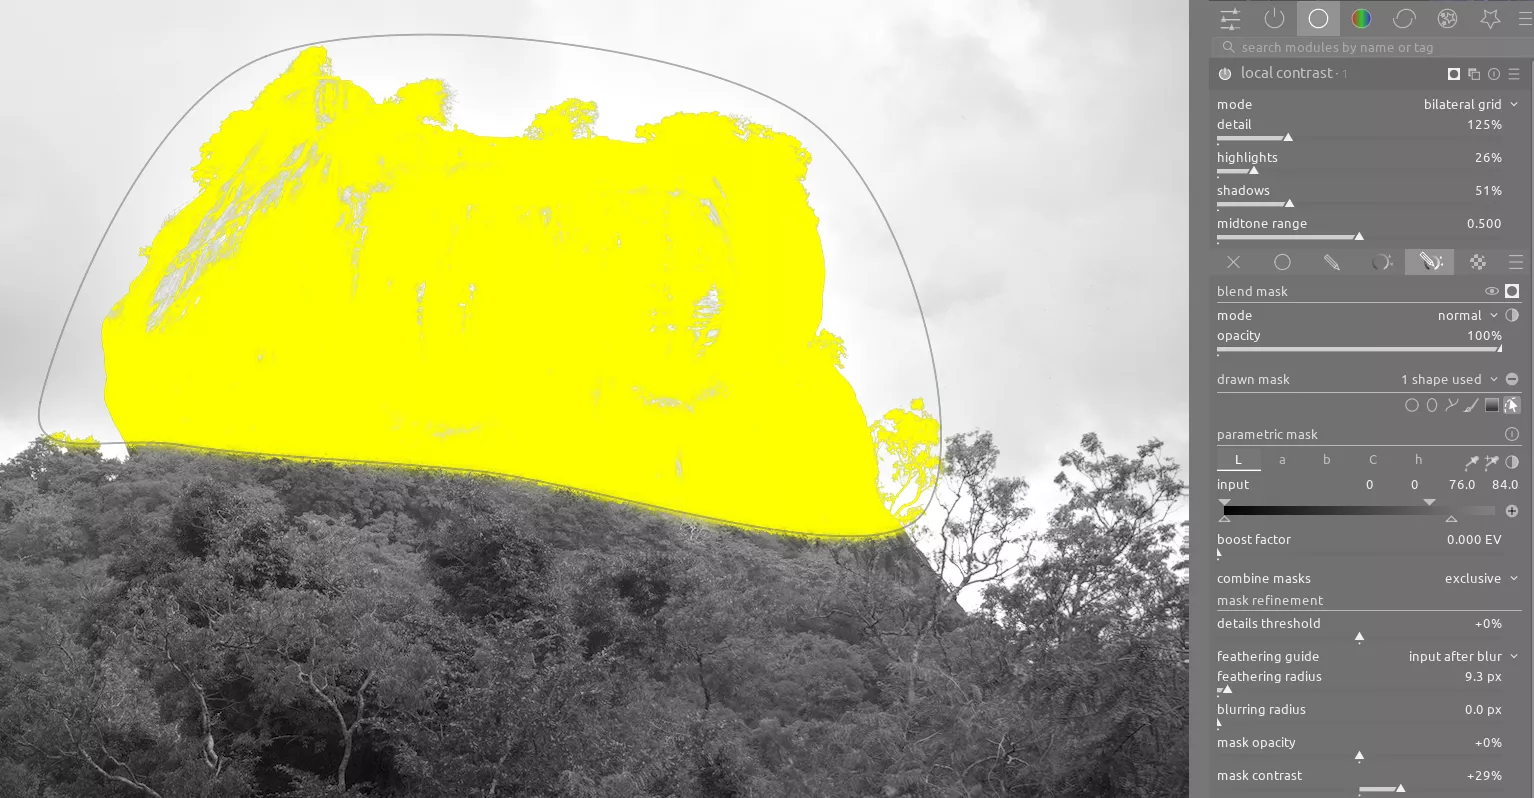
We can also use another instance of local contrast with this same mask to select only Sigiriya to further enhance the details of the rock:
Final Look
All of these adjustments create a significantly different image. As I discussed in the post on Incidental Photography, this is a good example of how you can bring an "ordinary" photo to life. This shot was not taken during Golden Hour or with other special conditions yet a little bit of post-processing work in darktable can really bring out the magic of this majestic place.