
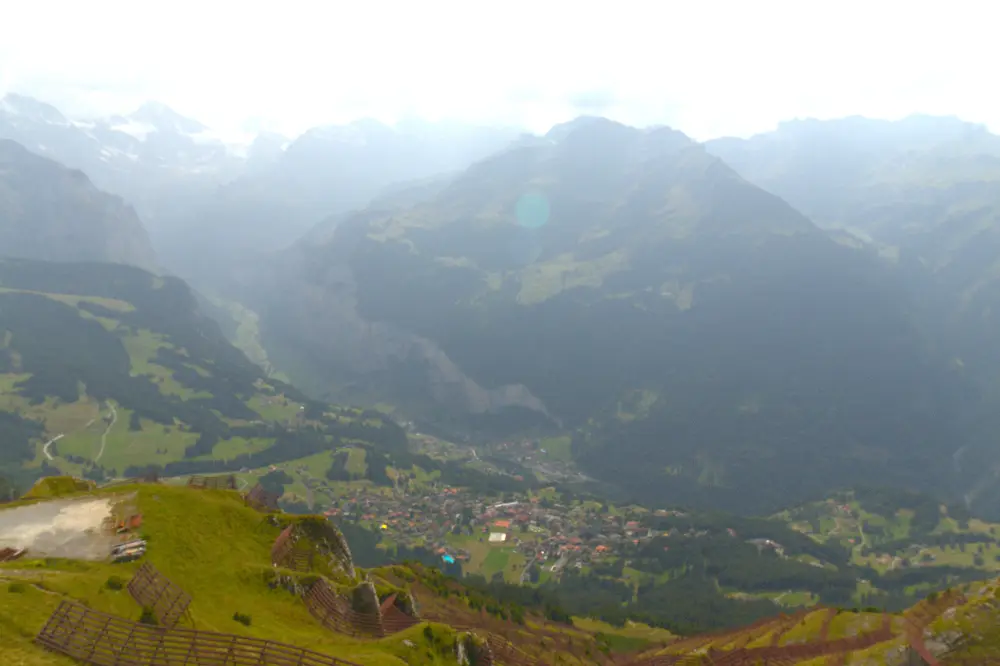
Sometimes you have the opportunity for a great shot but it's blocked by a fence, tree, power lines, or other immovable objects in the foreground. It's often possible to remove these distractions using darktable's powerful retouch module and significantly improve the image. Let's walk through a few examples.
Removing a Spot or Solar Distortion

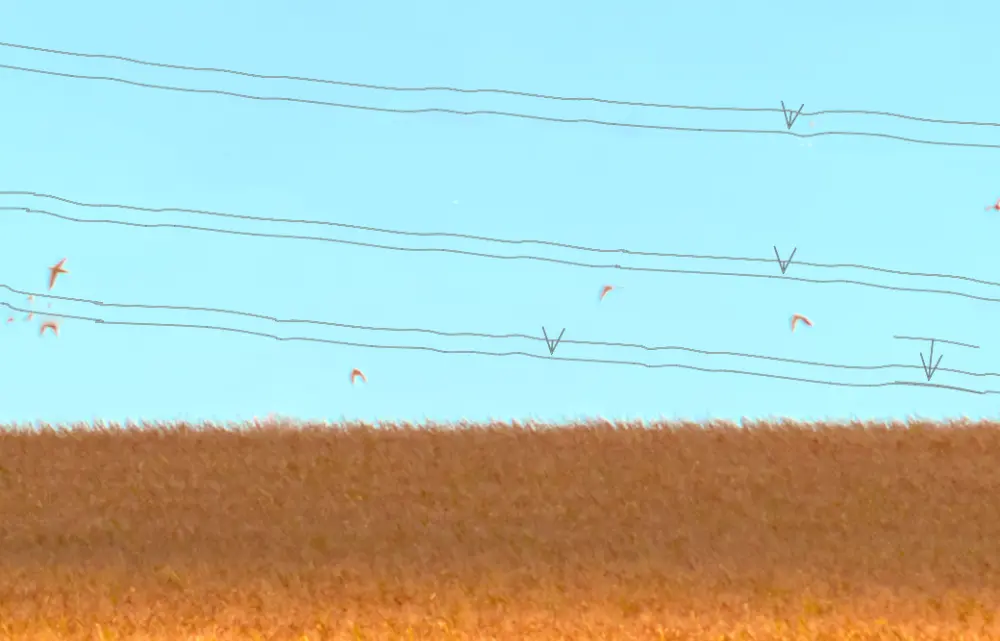
This is the easiest case - removing a round object like a solar distortion or dirt from an image. You can do this using the heal algorithm and a circle shape:
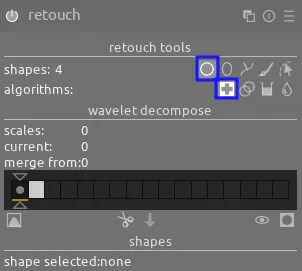
The exact steps are:
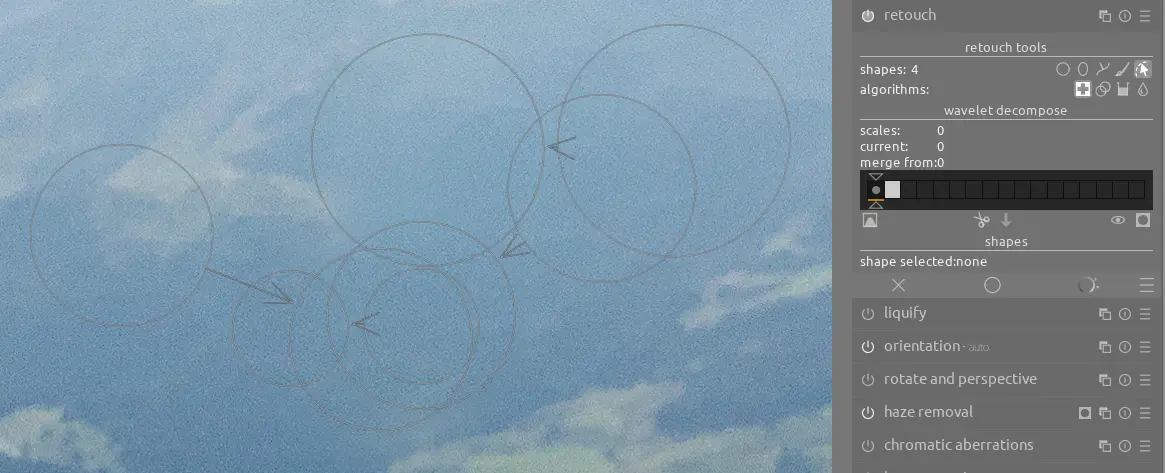
- Choose the circle shape and the heal algorithm and then SHIFT+click to select a source sample area: this should be similar to the area you want to heal in color, brightness, and texture but free from distortions
- Now, click over the undesired spot to heal it. You may need to adjust both the feathering (hover over it and scroll) as well as the placement of the source.
- Repeat with additional shapes as needed to fully heal the desired area
The result looks as follows:
A Complicated Power Line Example

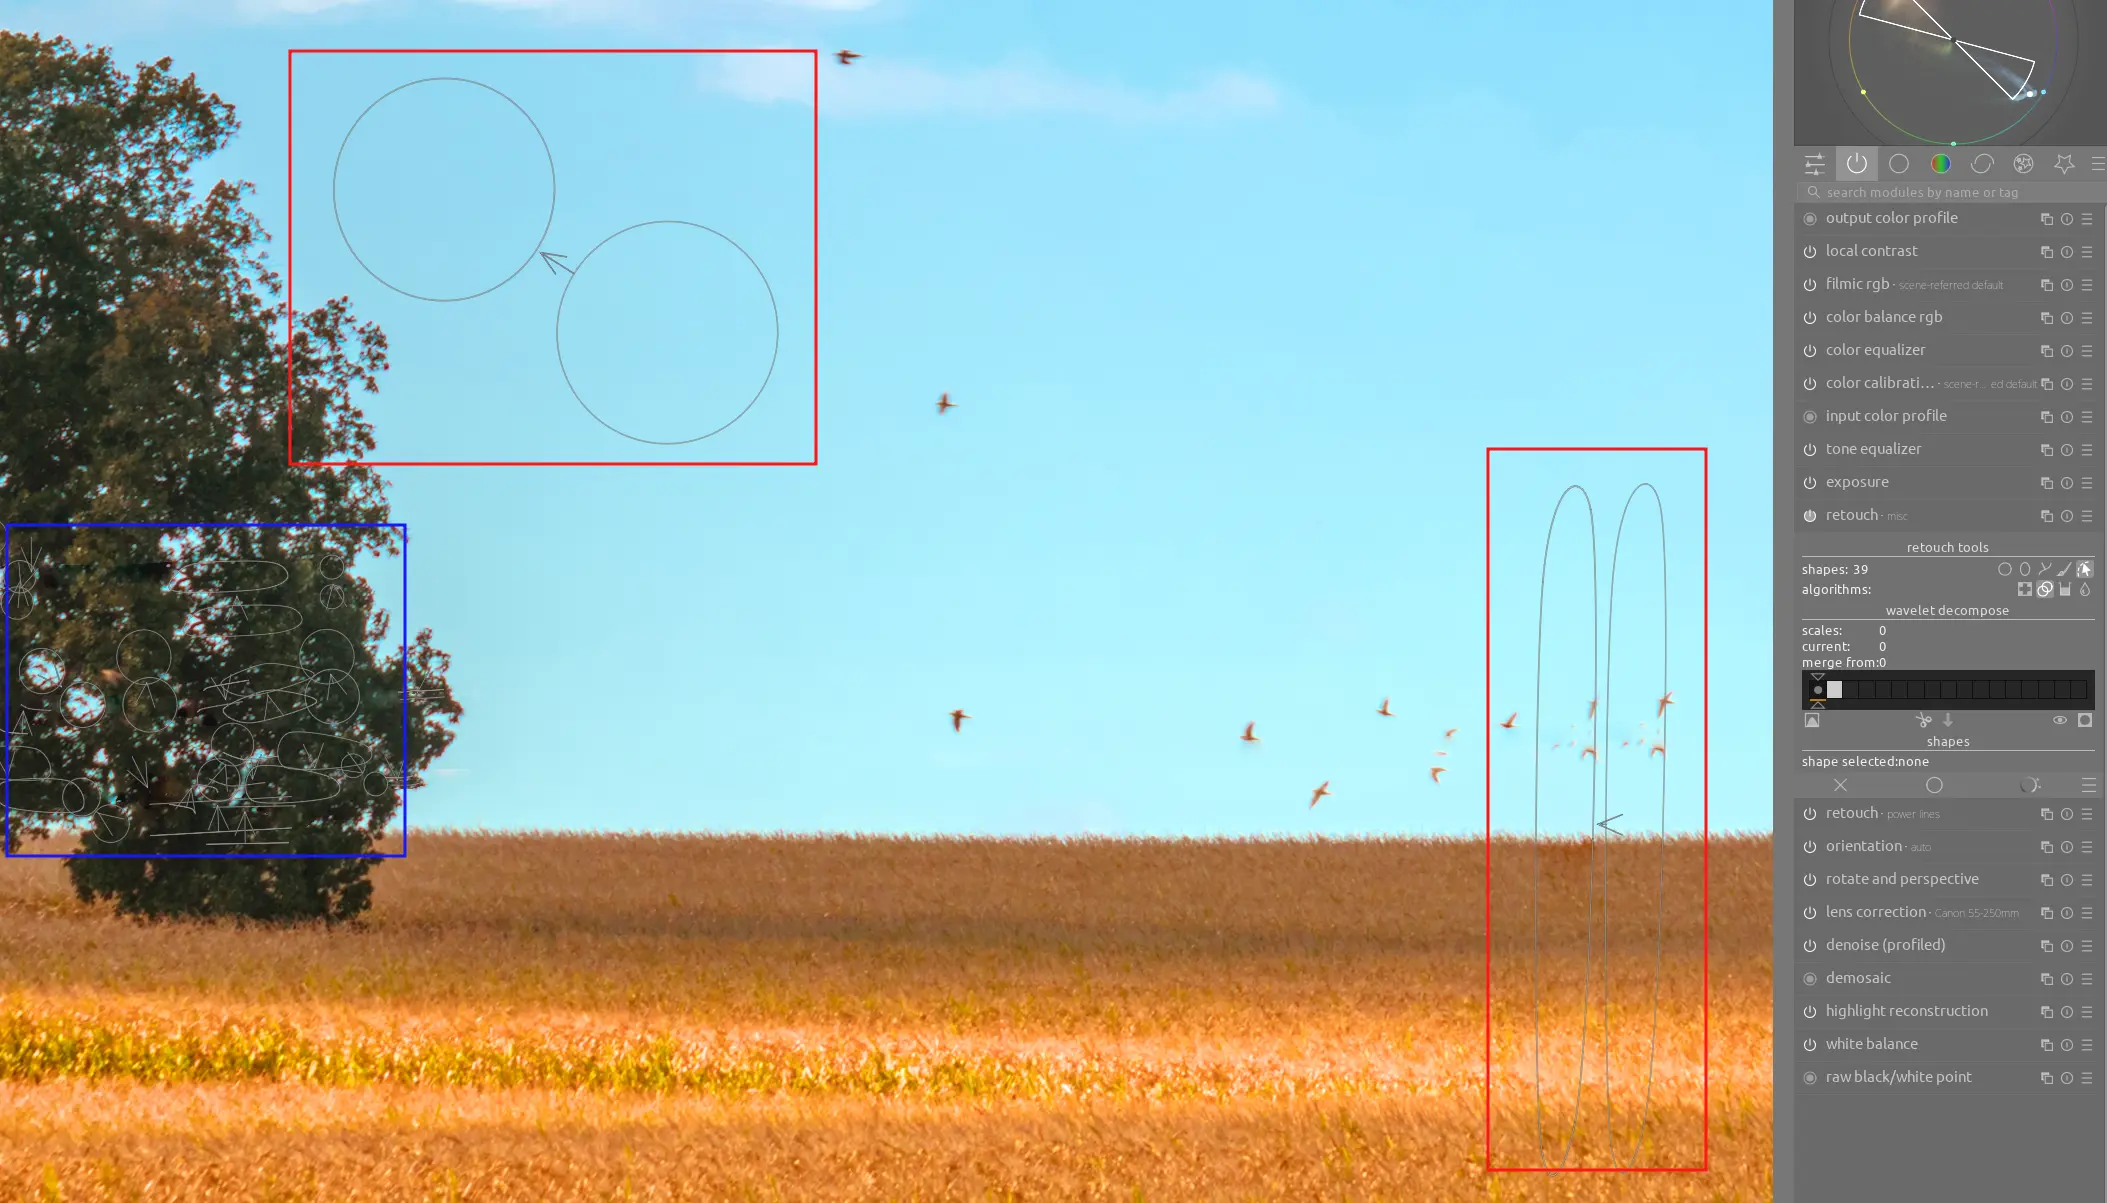
You can remove significant distractions using the retouch module, such as the power lines and pole in this scene. First, we need to see how retouch can divide an image into various parts based on the size of the objects in the image:
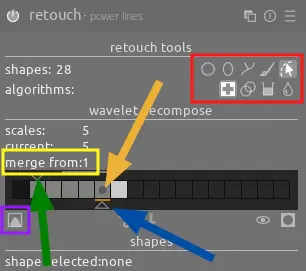
The triangle slider indicated by the blue arrow represents the number of layers the image is divided into - the more layers, the more fine-grain each division for targeted edits. See the animation below for how each of these layers looks (click the button highlighted by the purple box to see each layer like this):

The triangle indicated by the green arrow and the box in yellow are related - this lets you apply a shape to one of these layers and automatically repeat it on other layers down until the layer indicated by the arrow (avoiding manually repeating the same work multiple times). For example, this could let you apply a shape to the 3 coarsest layers of an image but leave all finer layers alone. In the above example, however, we want to apply the fix to all layers since the power lines are visible in all of them. The dark circle indicated by the orange arrow shows which layer is currently selected. For more details, see the manual.
We'll use the heal algorithm and brush shape (see the red box) for most of these; this generally does a good job except for the power lines in front of the tree where it introduces distortions when sampling around green areas of the tree which are near a bright area of light shining through (we'll handle this problem next):
After removing the power lines, we can use a second instance of the retouch module and just a single layer (the default) to remove the power line pole, fix distortions caused by removing the power lines in front of the tree, and miscellaneous adjustments. Often times we'll use the clone algorithm (see the blue box) to avoid sampling undesired nearby pixels but sometimes the heal algorithm (red boxes) is also useful:
Removing a Distracting Tree Branch


You can also create custom shapes to fit the desired area you want to heal. In this example, we create a custom shape to remove this distracting tree branch:
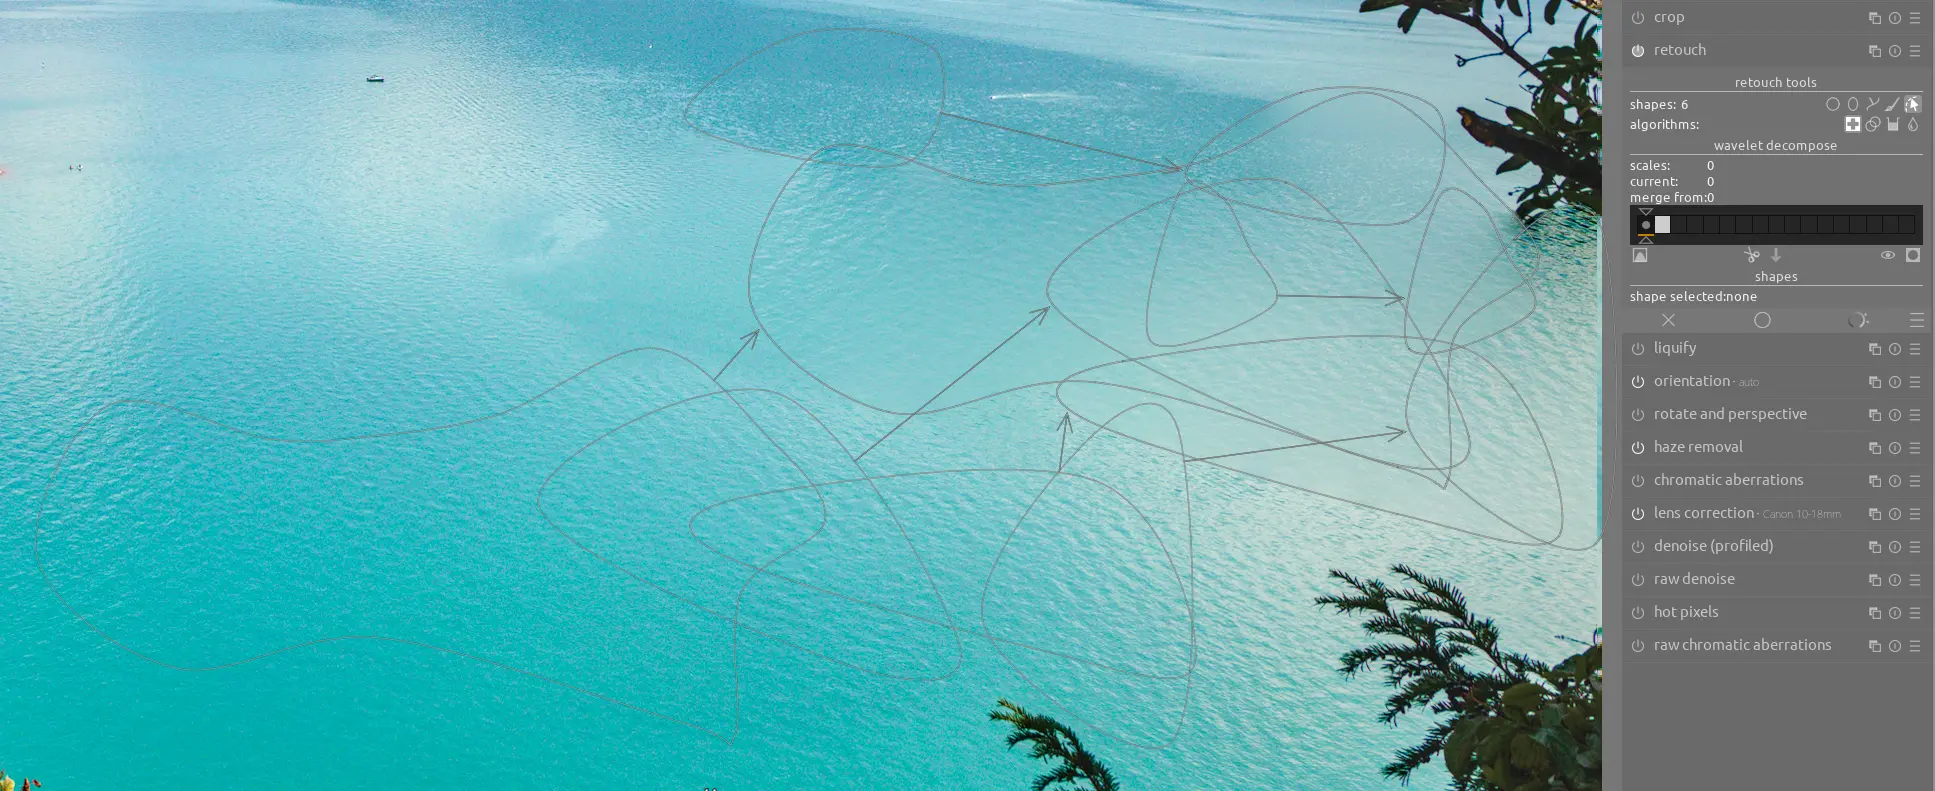
Notice once again that several shapes are used in an overlapping pattern to remove the tree branch and then blend the replacement colors and texture into the image.
Conclusion
Darktable's retouch module is a powerful tool for removing distracting objects from an otherwise beautiful image. Remember that it's important to select a good source, apply the fix to the correct layers, and repeat with additional shapes as needed to blend the changes into the image.