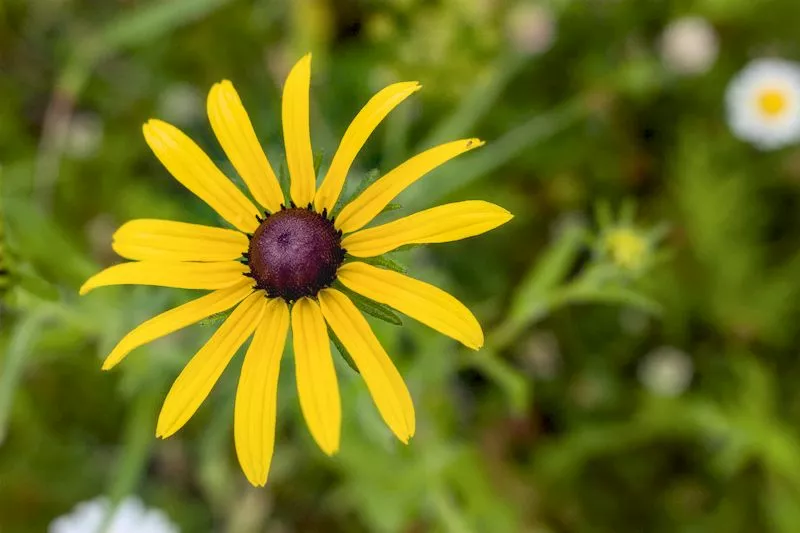
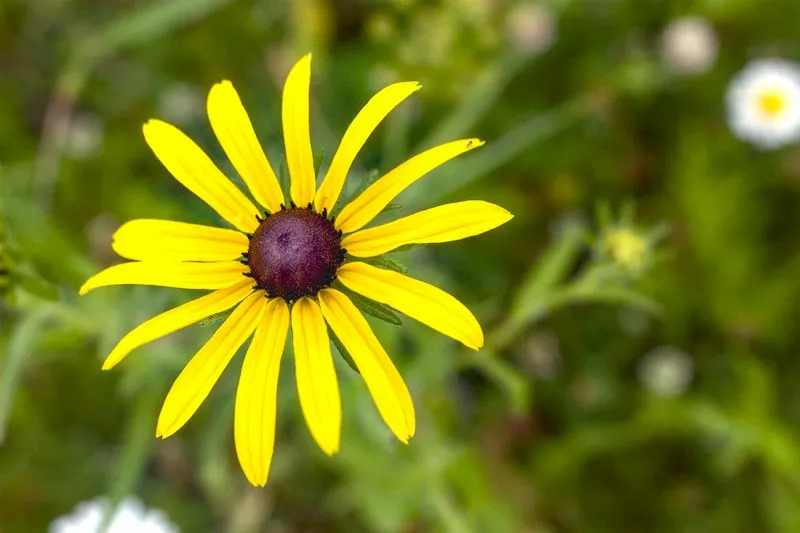
At first glance, the flower above on the left might look fine. However, there is a hue shift going on which makes the flower look green/yellow even though it should be an orange/yellow. This phenomenon is present on a huge number of the JPEGs1 generated on-the-fly (also know as out-of-camera JPEGs) from smartphones and other devices. The user lhutton summed it up well in this discuss.pixls.us thread:
This made me realize why those of us that grew up with digital imaging being the norm saw filmic as “wrong” out of the gate. The cyan transition in skies particularly was expected in my images from my experience growing up and when I didn’t get it the first time around it was visually jarring to me. Probably why digital renders try to replicate it too. For a huge chunk of the active under-40 demographic these days hue shift is normal. Maybe people with a stronger art background know about it.
The problem is we see so many of these kinds of photos online that we become desensitized to it and think this is normal. Having a yellow flower shift to green, a blue sky shift to teal, or a beautiful sunset with a yellow halo are NOT normal! This is not actually how images should look, and as we'll see below, filmic rgb can easily help us correct this problem when developing RAW files.
What Is The Problem?
Let's take another example image:
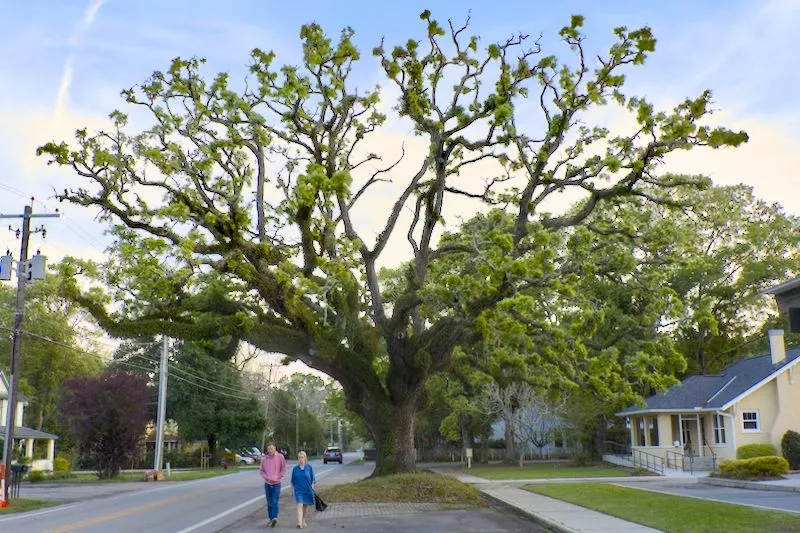
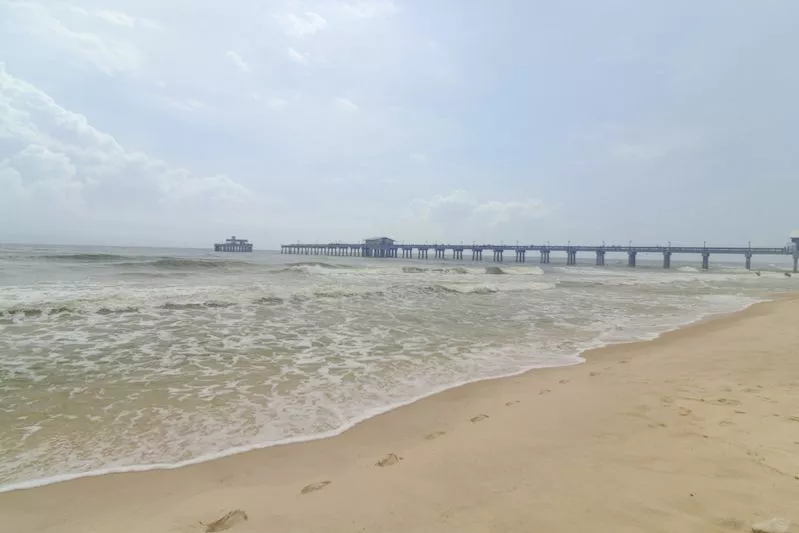
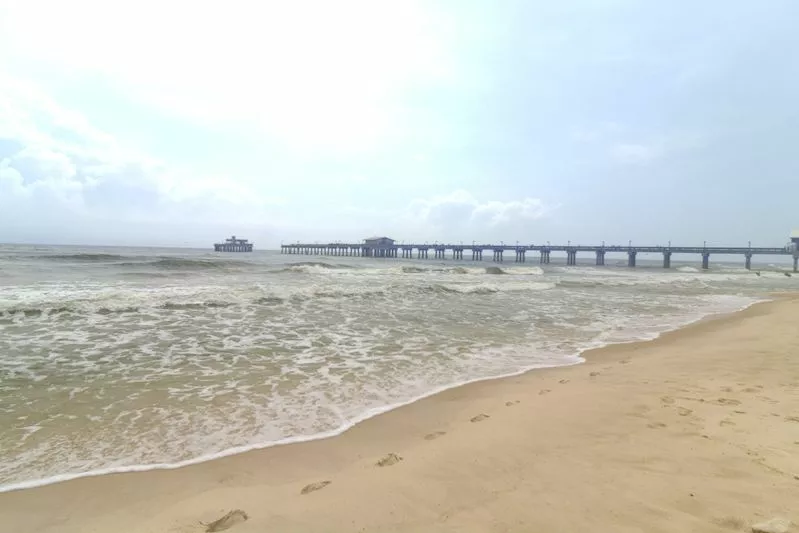
Clearly, the original image on the left (without filmic), has something wrong with the sky - it's teal when it should be blue. If we put a color picker on both of these images, we can see immediately what is happening:
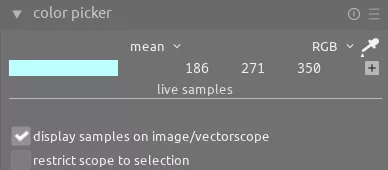
original version:
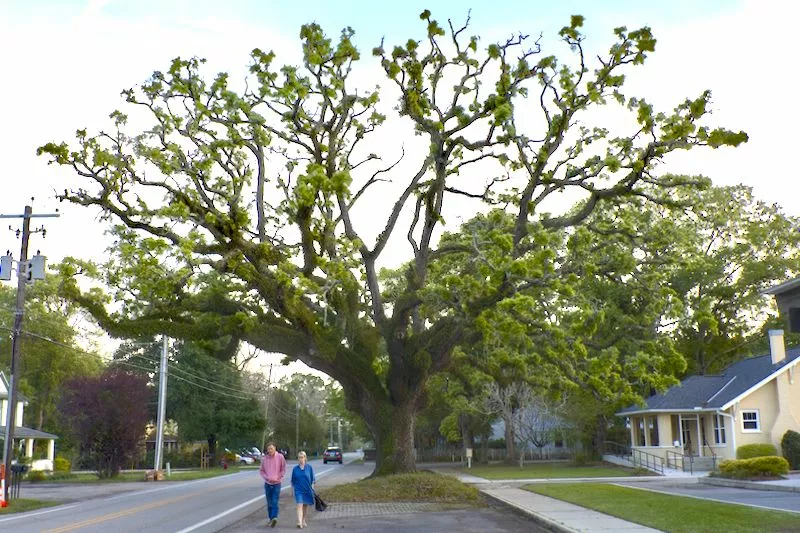
filmic version:
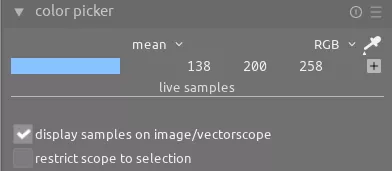
One (or more) of the channels is getting clipped when we raise the exposure. You can tell because (in this case) the B channel is going above the maximum value of 255. This clipping of one channel results in a hue shift, and thus the teal color.
When applying a quick display transform on an image, as is done when you take a JPEG photo with your smartphone, the algorithm has to balance several tradeoffs, e.g.
- Do I correctly expose this image but clip one of the channels in some places?
- Do I underexpose the image so no channels are clipped?
- Which part of the scene is the "important" part that should be properly exposed?
In many cases, this algorithm does a good job, but not always. Moreover, it can't do things like selectively adjust exposure on certain parts of the image, like you can do with tone equalizer, because it cannot tell where adjusted transitions between tones will look bad to the user. Fortunately, if you capture RAW files when shooting, you can process them with filmic rgb in darktable and easily correct this problem. In all of these examples, all I've done is turn on the filmic rgb module. Yes, you can adjust the white relative exposure slider and make other adjustments, but to fix the hue shift all you need is to activate the module.
To understand this another way, watch the excellent video in the beginning of that same discuss.pixls.us thread.
When Does This Happen?
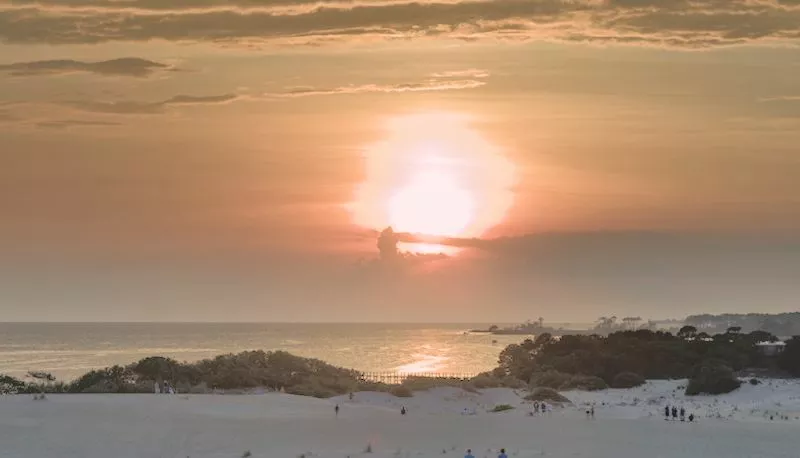
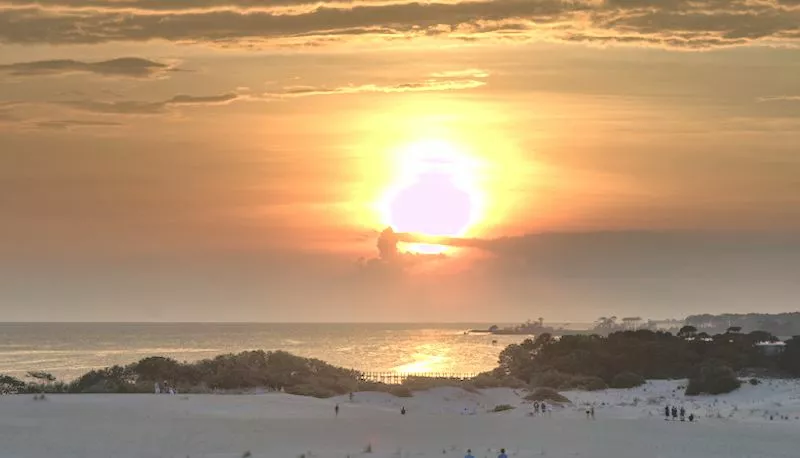
Interestingly, this sort of unintended hue shift happens in a wide variety of situations. Let's look at several more examples (the originals without filmic are on the left):
In this case we see the classic yellow halo around the sun:
This shows a teal tint to the sky as it gets brighter:
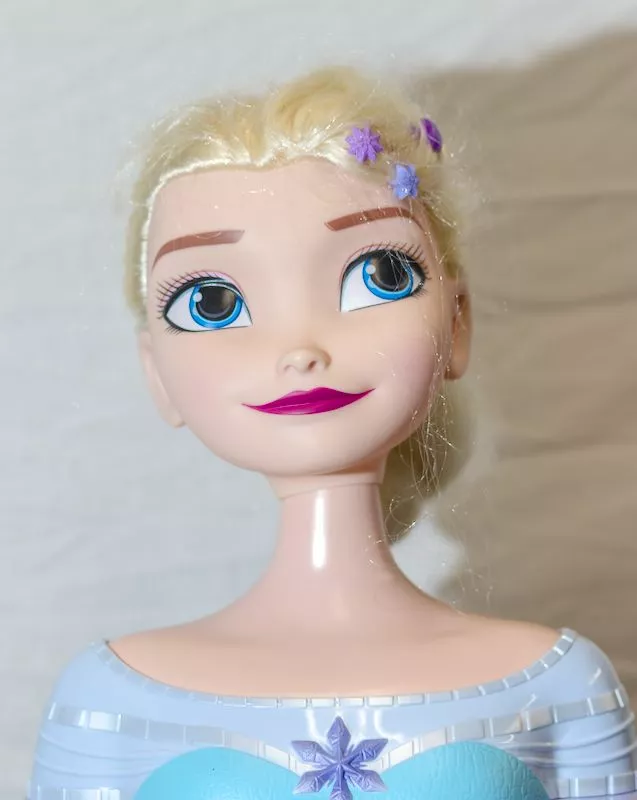
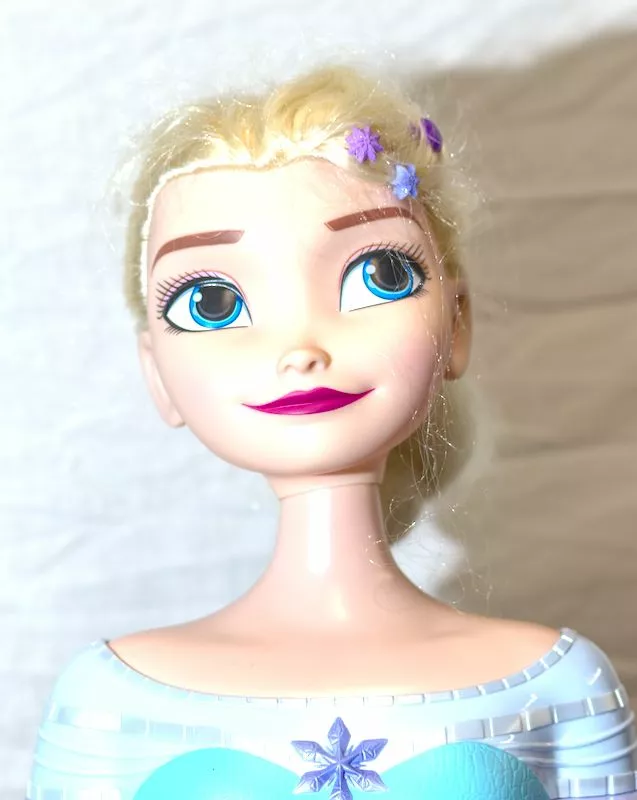
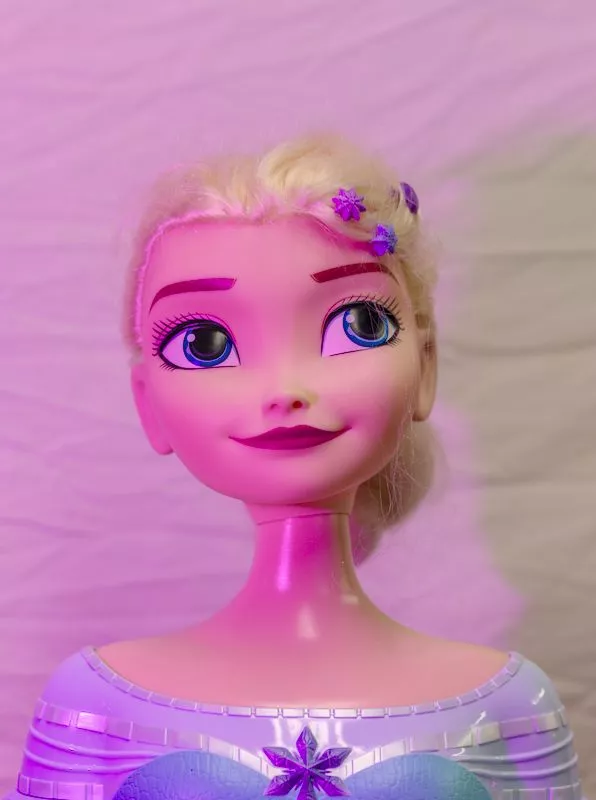
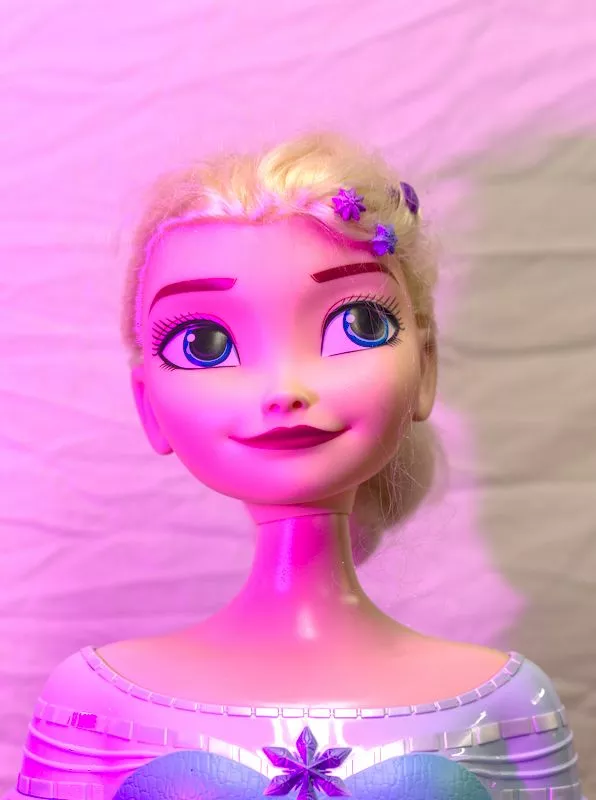
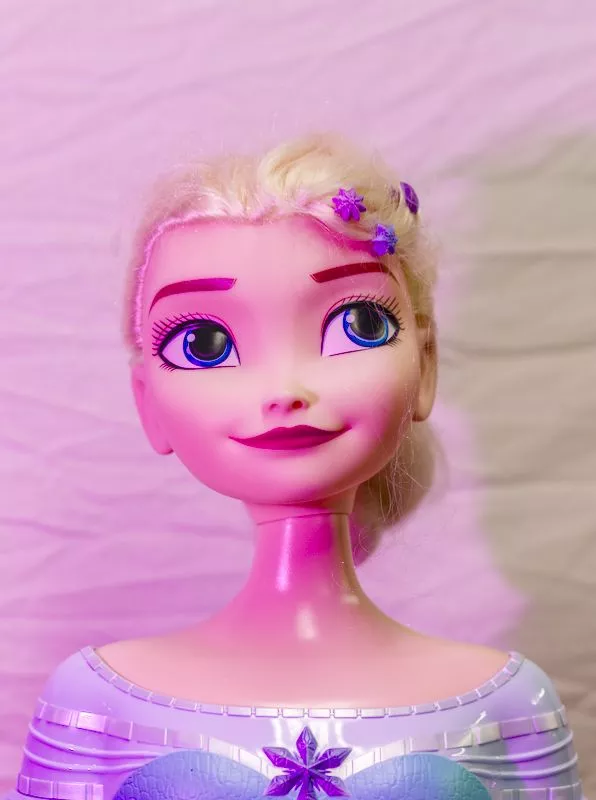
Elsa's face and hair are distorted with a yellow hue shift:
This distortion is even more pronounced when we intentionally light the subject with a colored light (in this case magenta):
What About Sigmoid?
The sigmoid module also corrects for the hue shift if you prefer using it over filmic rgb (the sigmoid version is on the right).
I prefer the sigmoid version for this image:
Both modules successfully recover the blue in the sky:
Conclusion
While it is great that it is easier than ever before to take photos using your smartphone or other devices, we must be vigilant to not get used to the distortions that quickly-generated JPEGs1 introduce. Especially in scenes with high dynamic range, it's important to underexpose or capture a RAW file so you can utilize a tone curve like filmic rgb or sigmoid to avoid ugly hue shifts in the highlights.
1 I talk about JPEGs here but this applies to other formats like HEIF too