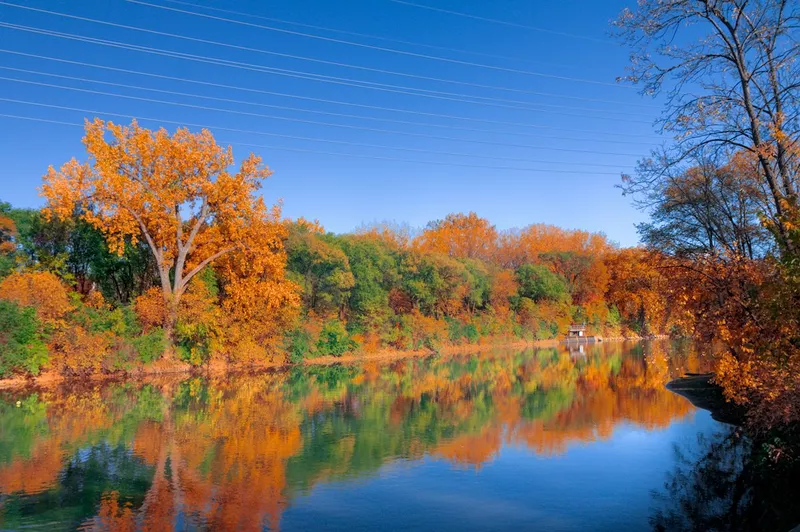
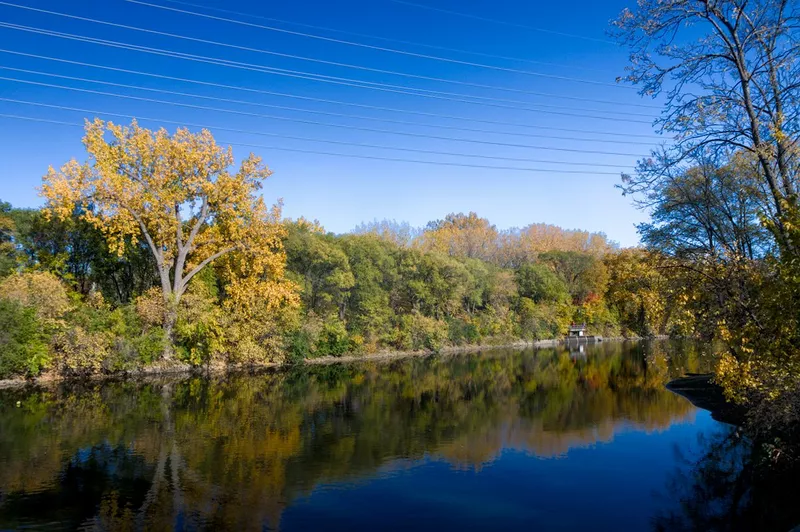
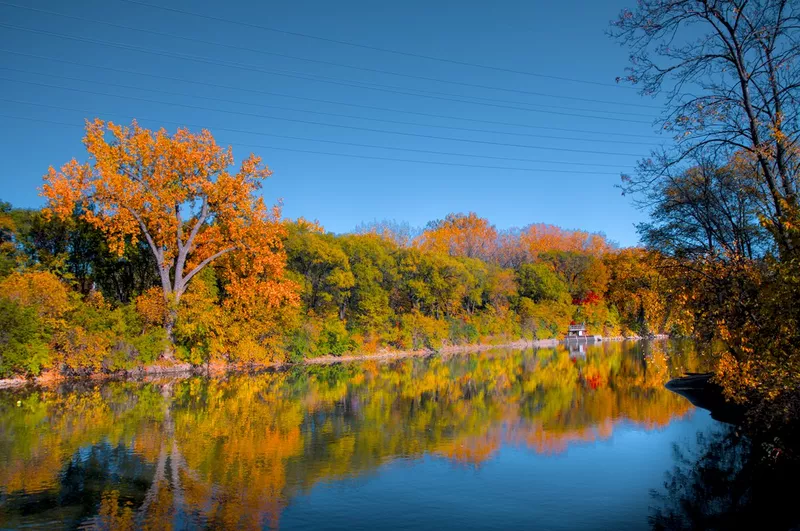
When developing a photo, you may want to change the color of an object or set of objects in a scene. In this example, the autumn colors were just starting to change but would have appeared much more dramatic a week or two later. Let's show how we can use darktable with a couple of different methods to shift the scene to this later, more dramatic time period.
Color Balance RGB
The first method uses color balance rgb with a parametric mask to select only the area where you'd like to shift the colors, and then add the desired colors. Aside from shifting the trees from a pale yellow to a vibrant orange, notice also how a second instance of color balance rgb is used to give the green trees a bit more of a blue tint (this is an optional enhancement), which helps provide further contrast with the warm orange colors.
Color Calibration
Alternatively, you can also use the channel mixer in color calibration to change the colors of part of a scene. In fact, this method can be preferable in many cases, and may not even require a mask. To better understand the channel mixer and how it works, I highly recommend this tutorial.
The settings are all the same as seen in the color balance rgb video above, except the color balance rgb - saturate greens and color balance rgb - trees change color modules are disabled. Instead, we use a second instance of color calibration to change the colors of the yellow leaves. The first step is to set the color picker on the yellow leaves and analyze the mix of each of the 3 channels (R, G, and B):

As we can see, this color is dominated by red and to a lesser extent green. In order to make it more orange, we need to increase the red and decrease the green. We can do this as follows:
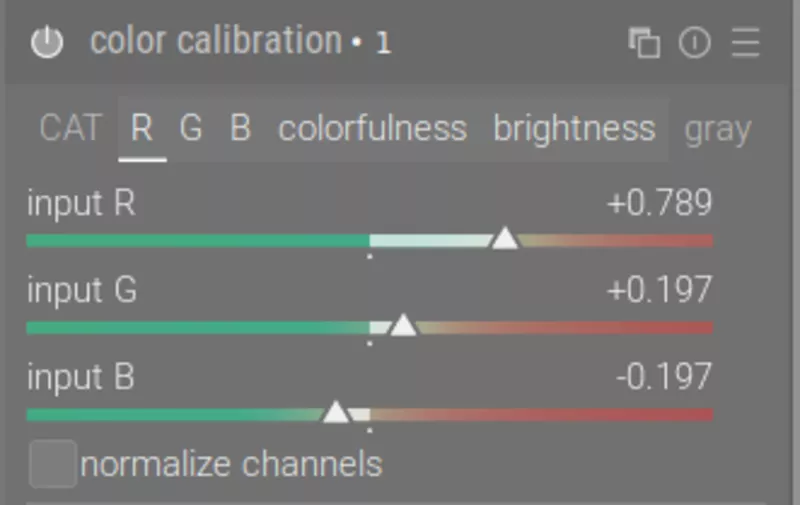
Red Tab
Increase the red in areas where green is prominent by using the input G slider (and decrease input R to compensate and prevent there from being too much red elsewhere in the scene). Decrease input B to make the green leaves greener too:
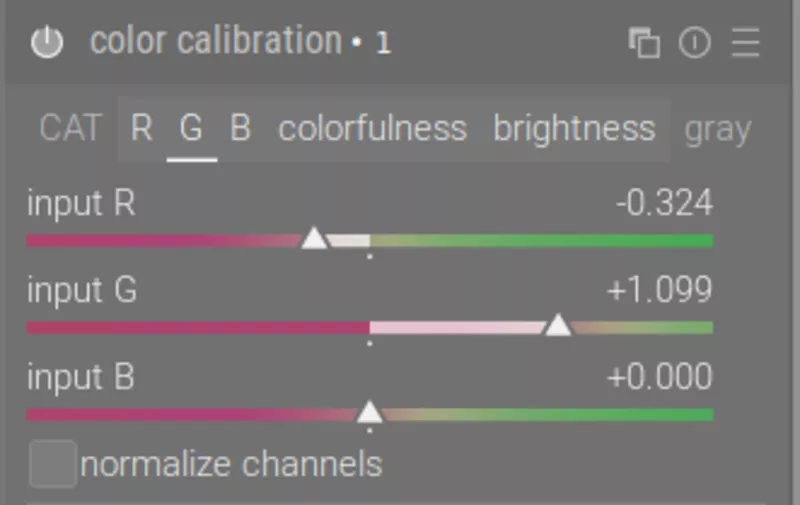
Green Tab
Decrease the green in areas where red is prominent by using the input R slider:
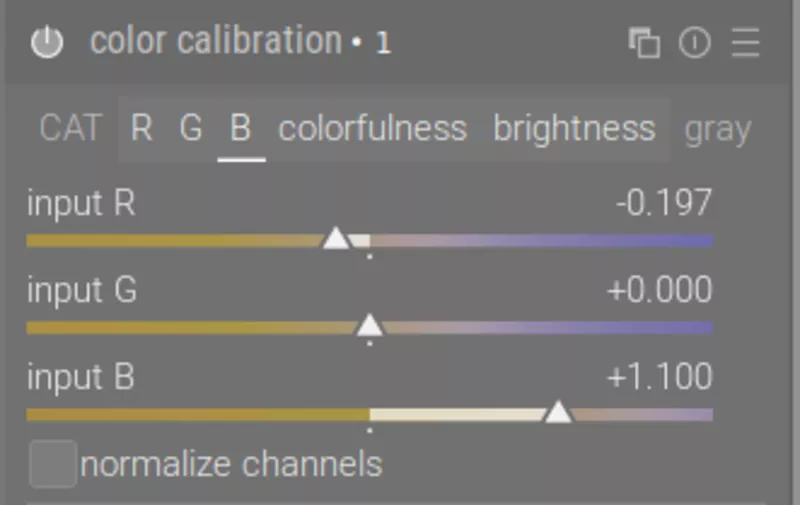
Blue Tab
We also reduce the amount of blue in the trees using the input R slider and compensate for this in the sky by increasing input B:
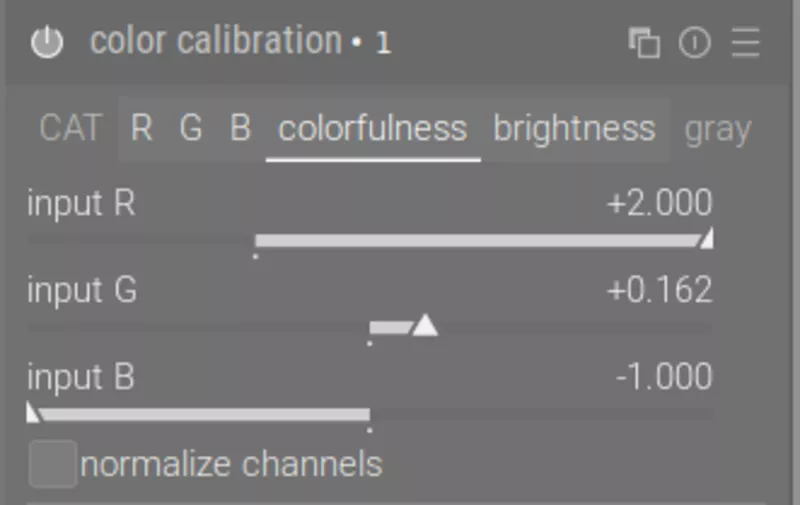
Colorfulness and Brightness Tabs
Moreover, we can make some adjustments to saturation and brightness:

Final Product
Now we can compare the before and after of the color calibration method:
Comparison
Moreover, let's compare the color balance rgb method (left) to the color calibration method (right):